Akikiki
A'-Lo-HA ! y'all
flyguyarron, Realistic Avatar picture. Really like the display of passion for the 3. ")


You can install our site as a web app on your iOS device by utilizing the Add to Home Screen feature in Safari. Please see this thread for more details on this.
Note: This feature may not be available in some browsers.
This was the day we picked up the 3 and I went to take a pic of the emblem and my daughter just hugged the car!flyguyarron, Realistic Avatar picture. Really like the display of passion for the 3.
Hi Flyguyaaron,here is the other one mentioned, I may do a mix of the two, power from the side (save my USB's) but use the LED from this thread
Any way to upgrade the dome lights
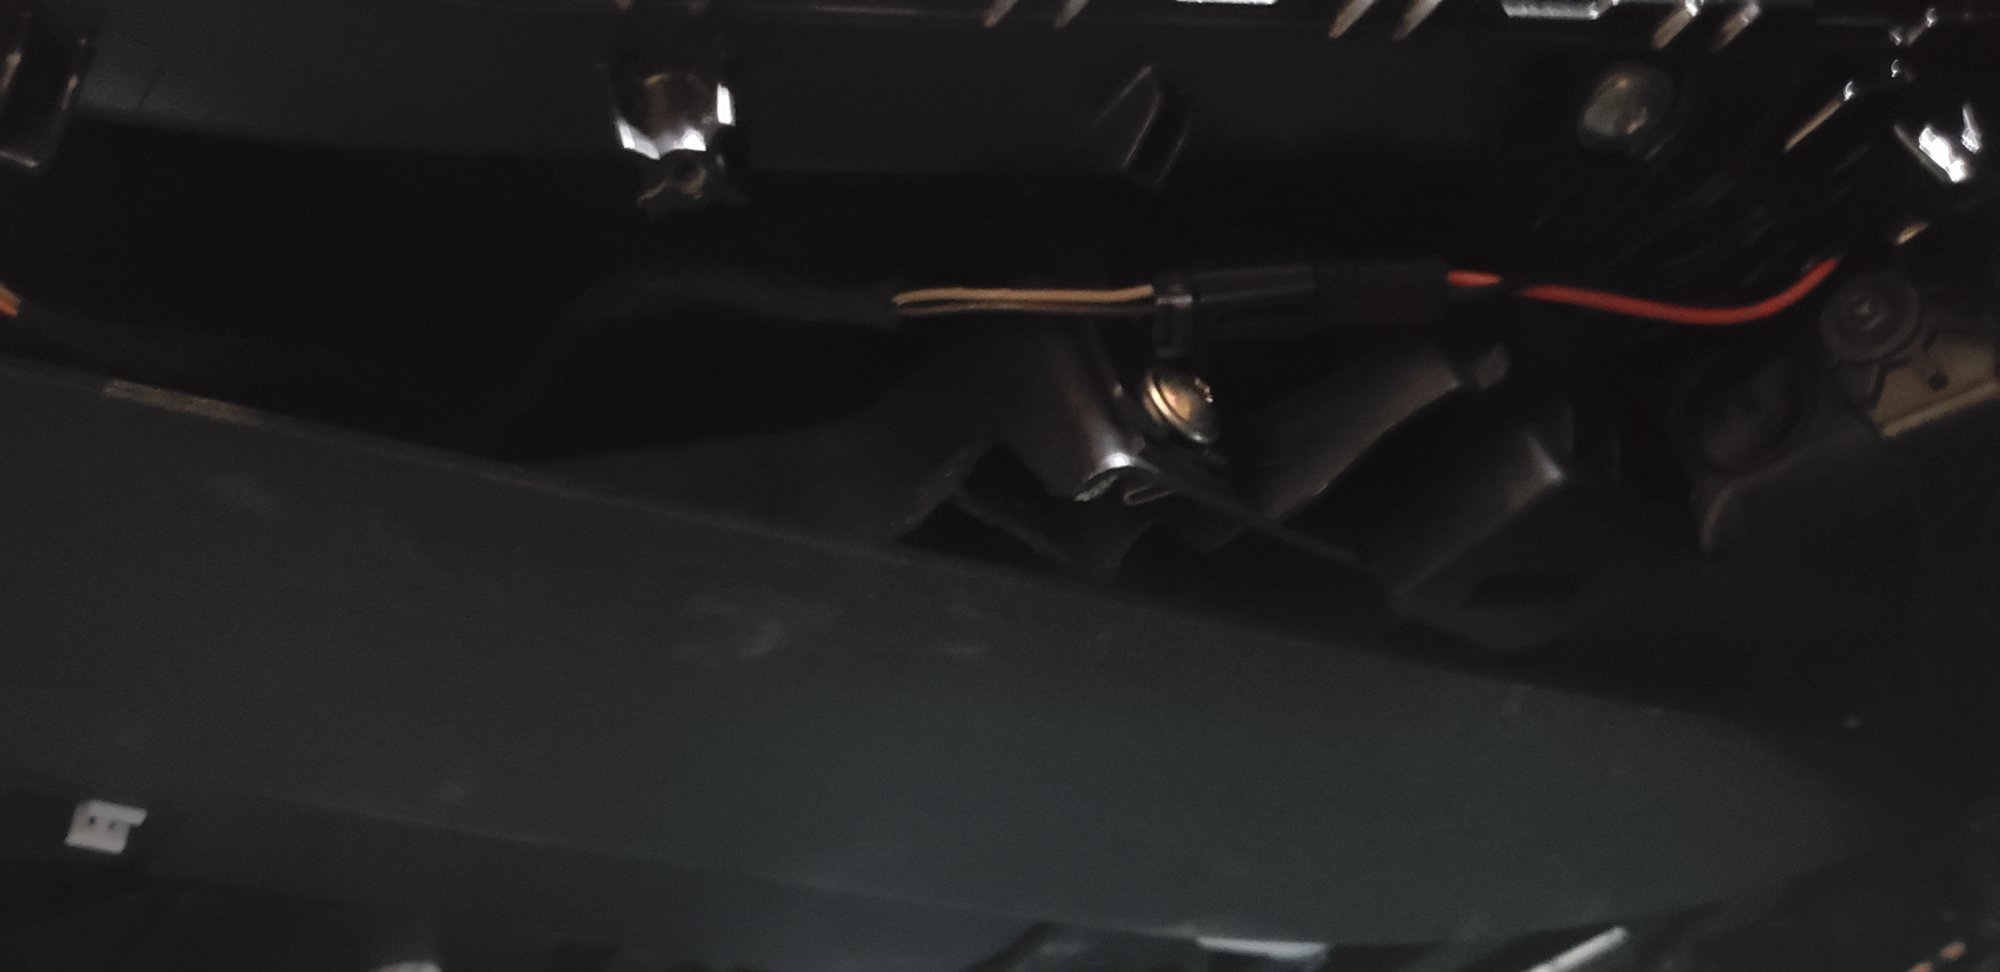
Open the right side of the center console.
There is a two wire (brown and white) plug which connects the LED from inside the middle center console to 12v.
Unplug this, and plug in your own 12v LED. The plug/connector is the same one used in all the interior LED's.
Attach that LED to the underside of the display mount.
The lid open/close sensor is not wired in line with this power line, so you're good to go.
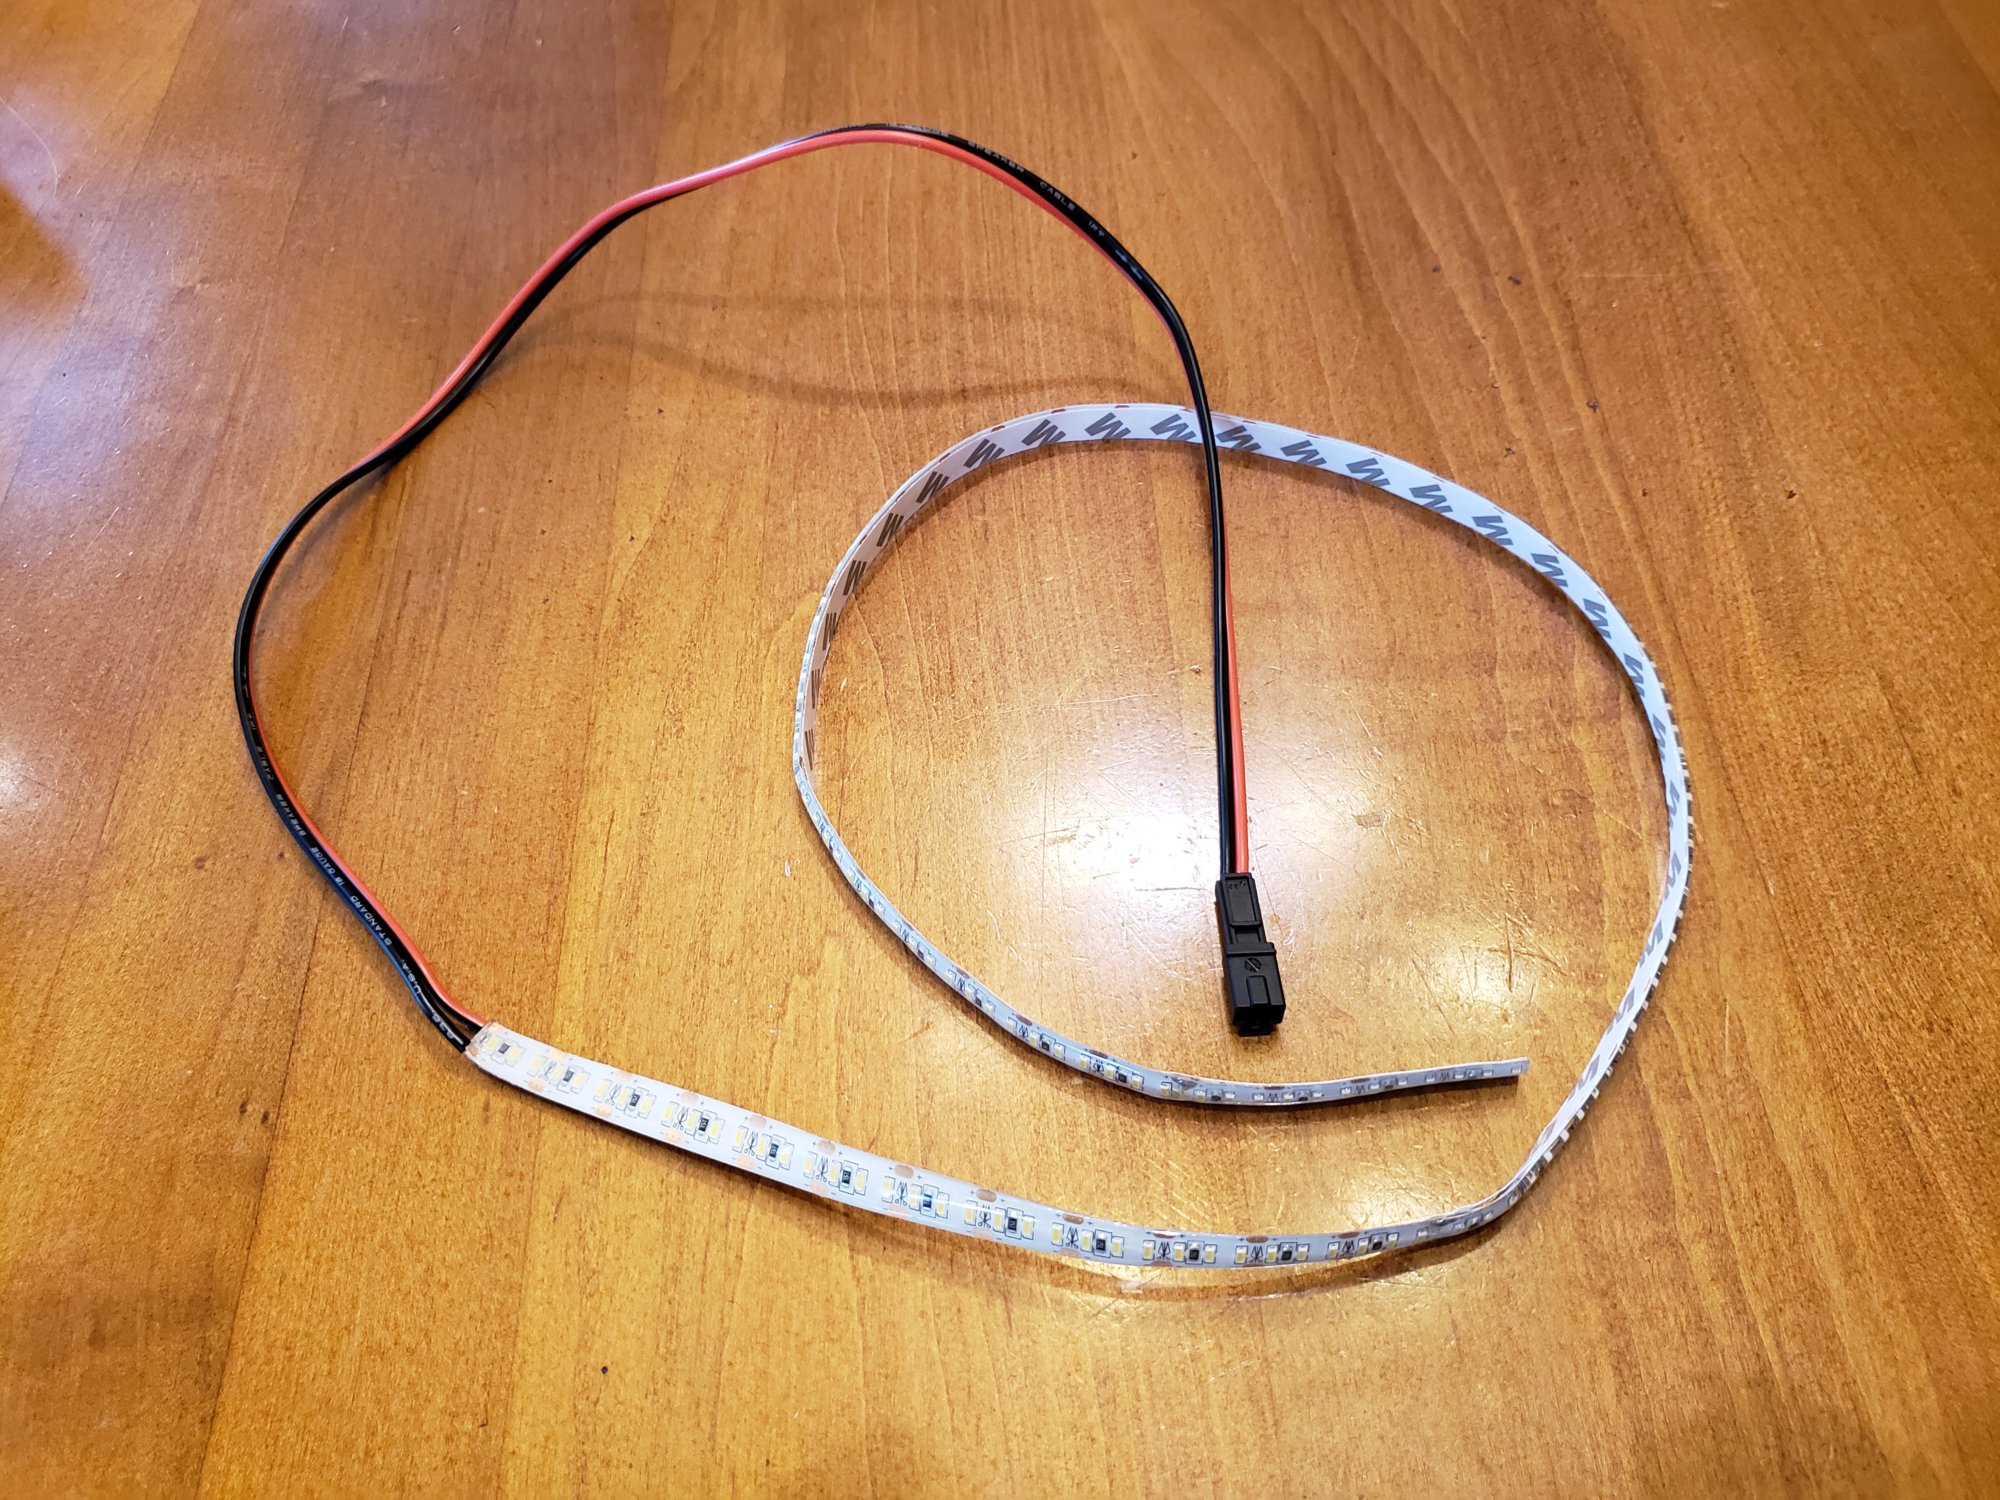
This is the LED strip and connector I used for the trunk. You only need a strip of 3 LED for this purpose.
Posted originally by :
chojn1
[...]
Unplug this, and plug in your own 12v LED. The plug/connector is the same one used in all the interior LED's.
Wow! Let me digest a lot of the feedback.
This was accomplished by plugging the USB powered light into a USB hub below the phone dock. So for those who are asking, it is on when the car is on, maybe if someone makes a USB powered timer or something you could program it to be off during the day and on at night. But during the day you can’t really see it. So I’m good with it being on when the car is running.
I would want to refine the install before sharing it too much. Also, let it be noted that I am in the north east. So this has not had a chance to stand the test of warm weather possibly degrading the adhesives used.
So yeah this is really simple, the hardest part was actually finding out how to do it and what parts I needed.
Here is what you need:
1) The actual LED bar: This comes in a 10 pack which is obviously excessive. You only need a 1 pack but I didn’t see it on Amazon right now. I don’t know if anyone can find a single pack but I bought this 10 pack. You take one of the LED bars and covers, cut it to your desired fit.
https://www.amazon.com/gp/aw/d/B01LL2SLME?psc=1&ref=yo_pop_mb_pd_title
2) Adhesive strip to attach LED bar to the phone dock cover: This is also an excessively long adhesive strip. Can probably use any generic strip, but this one was designed and recommended for this particular LED bar.
https://www.amazon.com/gp/aw/d/B074J3X2SJ?psc=1&ref=yo_pop_mb_pd_title
3) The LED light: So this is the actual LED light. You cut it to fit the LED bar, put the cover over the LED bar and plug it in. That’s it folks.
https://www.amazon.com/gp/aw/d/B01LG99O0K?psc=1&ref=yo_pop_mb_pd_title
Like I said, I will look into more refining to make it better. But it looks awesome right now as it is. This really is super simple. If you get everything from amazon all you will need additionally is some kind of saw to cut the LED bar and cover. I used a small multi tool but you could use a small sawzall or other small cutting saw.
Hope this helps everyone. Any improvements and/or recommendations to make this better would be great to share with the community.
To anyone who is interested, I installed this LED light bar right above the phone dock. Pictures don’t do it justice but it is AWESOME. If anyone wants the details on how I did it I would love to share. Cost was less than $50 and super easy to do.
Do you know what that connector is? (I.e. manufacturer PN for pins and housing, and/or Mouser/Digikey PNs?)
I don’t think this will work as well as you might want, since you can only use 7” or so of the strip of mounting to the lid you may not get many LED’s I test for a similar strip and it didn’t give much light, just something to considerI haven’t bought this yet but it’s bluetooth connected to phone, scheduling feature and proximity sensor. May allow it to be more functional then an always on light depending on how well the controls work.
Smart Color Light Strip USB LED LTB010 with Bluetooth, 2 meters (6.5ft) LED Strip, Water Resistant, 16 Million Colors, Proximity Control, Schedule On/Off, Dimmable, Apple Watch Compatable https://www.amazon.com/dp/B01HELCF5A/ref=cm_sw_r_cp_api_i_X19lCbGETKYM0
Alright everyone, I have looked over every thread I can find on this and decided I wanted one that would be on when the car is on, so I decided to go with USB, hopefully the USB ports up front will have enough power for this:
LightingWill Black 6 inch LED Under Cabinet Lighting, CRI90 SMD2835, 5V Daylight White 5000K-6000K,3W(5W Fluorescent Tube Equivalent) 160LM Under Counter Lighting https://www.amazon.com/dp/B01MXXC5B7/ref=cm_sw_r_cp_api_i_VHumCbW2ZA3Y3
Will update after I get it as this would be one of the easiest and cheapest ways in my opinion
Ah I see what you did, that’s really smart!I just used the LED lights with adhesive backing around the perimeter of the Trapezoid lid. View attachment 367273
Ah I see what you did, that’s really smart!
Would love to see pics of the lights in the back seatsThanks! I used the Luminoodle LED lights which allows you to control the brightness and color. It worked better than expected. That electric blue looks awesome. I also purchased 2 USB LED lights to plug into the back seat USB connectors for the blue look to carry into the back seat. You can also control color and brightness on those lights also. Really gives a nice look to the interior. I'm just surprised this thread hasn't received more interest given our interiors are poorly lit and this is an easy and inexpensive modification with big impact on the interior look.
Would love to see pics of the lights in the back seats
This really makes me want to create a pass through from the center console out to the sides to run LED’s on the inside of the bottom of the seats, I have kids in the back so anything sticking out those back usb’s Worry me


