thanks for this! Did it and it's exactly what I wanted without sacrificing sound. I agree, I don't think people will even realize it's there. +1000
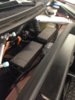
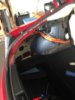
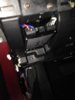
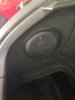
If you want a clean look here is what you can do. I ask for your forgiveness ahead of time, but the results speak for themselves:
Go out to Walmart and get a roll of black automotive fabric. Cut out a piece that is just roughly bigger than the NVX and basically wrap it around it, tucking in the sides with a few strips of adhesive velco. The fabric is porous enough to not block any sound, but the fabric is literally a perfect match for the factory fabric. Voila, no one will know you have a sub back there. And it is way less austintacious than any of the grills I looked at.
http://www.teslamotorsclub.com/showthread.php/37729-Subwoofer-Installation-in-Model-S