Tesla has PPF for rear fenders for US$50. Has anyone purchased it before? Are there better alternatives?
Model 3 All Weather Protection Kit
Model 3 All Weather Protection Kit


You can install our site as a web app on your iOS device by utilizing the Add to Home Screen feature in Safari. Please see this thread for more details on this.
Note: This feature may not be available in some browsers.
This. I installed something a local installer calls the "track pack" - covers up any high-wear areas.MUCH better alternatives. That small section helps but does not tackle rocker paint damage 100%. Best to install Xpel or STEK PPF on the entire rocker and up the 1/4 panel in front of the rear wheel.
Just tried installing the same exact kit today and failed miserably by myself. The piece is too long to do yourself, and I ended with bubbles everywhere. did you have bubbles during the initial install?I DIY'd for $124, using 3M scotchguard pro from invisiblemask.com. They have coupons, FAST5, for 5%. They include a nice kit with spray bottles, squeegees, microfibers.
You need 3 hands or two people, because the pieces are long. I used rhino ramps to raise the side up. Still you need to lay on your back. It's fairly easy, except that you have to lay on your back.
There are a couple other places that have good kits. 2018-2020 Tesla Model 3 3M Pro Series Clear Bra Rocker Panels Paint Protection Kit. I like this kit because it also includes the lower door parts. $180. You can pay $40 more for Xpel. I probably would have bought this kit, but I had already done the doors, so didn't need the lower door pieces, so got the invisible mask version.
Of course, Xpel also has a DIY kit.
View attachment 548131
Just tried installing the same exact kit today and failed miserably by myself. The piece is too long to do yourself, and I ended with bubbles everywhere. did you have bubbles during the initial install?
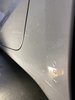
I might just do the rear wheel well area and call it. Does anyone sell just those two rear pieces?
Depends on the bubbles - only time will tell. Sometimes the fluid evaporates and the bubble remains.If you got bubbles and it's been a while don't try to get them out. Leave them and they slowly go away. It takes like a week.
Yup I’m thinking I didn’t use enough soap in the solution to allow the film to “slip”. It seemed to stick and lock in the bubbles. No amount of squeegeeing released them. Will try again as I ordered another full set for the rockers.Sorry about your bubbles, did you use the squeegee?!?