Welcome to Tesla Motors Club
Discuss Tesla's Model S, Model 3, Model X, Model Y, Cybertruck, Roadster and More.
Register

The New Evannex Kangaroo Pockets for Model S?

This site may earn commission on affiliate links.
Installed the Kangaroo pockets a few days ago. Attaching them with double sided tape instead of the screws is probably not feasible. There are posts on the back for the screws that would have to be removed and the netting and attachments for the pockets themselves would make it impractical. Plus the screw holes are so small that they're nearly invisible.

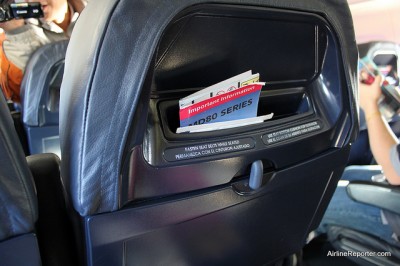
Took me about 30 minutes of work to install them myself. Not difficult at all and the Evannex instructions and video are a huge help. For now I'm using them to hold umbrellas as shown. But there's room for a lot more. In my humble view they're worth every penny as they solve a storage and accessibility problem for a lot of stuff I carry in my car.

Here are a few photos.

fullsizeoutput_4a8e.jpeg


DSC_7497.JPG


DSC_7499.JPG
 
Having the screw heads still visible inside the mounting holes gives the installation an unfinished-looking quality. Would have been nice if there was a corresponding fascia piece, or even just plastic plugs, to finish it off. But whatever works...
 
Having the screw heads still visible inside the mounting holes gives the installation an unfinished-looking quality. Would have been nice if there was a corresponding fascia piece, or even just plastic plugs, to finish it off. But whatever works...

Who sits in the car from an angle that exposes the screw heads? Nobody. Maybe a small dog would see them. But from a normal seating position they're not seen.
 
The EVANNEX offer appears to be an enhanced version of the ones you can buy on Amazon. Before I saw them on the EVANNEX website, I had ordered a set from Amazon, but haven't gotten around to installing them, yet.

I don't think it would be feasible to use 3M tape to install the outer brackets. The "pull" from the elastic is very strong, and there is not much surface area on the seat-facing side of the brackets.

However, it may be possible to create some U-shaped profile that holds the lower elastic, and use the 3M tape to attach it to the seat back.
 
Today, I finally got around to installing the Topfit luggage net I got from Amazon.com (before I saw that Evannex carries an enhanced version of this). The whole process took about 50 minutes - partially due to the fact that this kit came without any instructions.

Installing the nets was pretty straightforward, though. I started by placing one bracket, then used the power drill to insert the screws. Then I undid the screws, and installed the bracket on the opposite side. Lastly, I reinstalled the three screws on the original bracket.

My kit came with 6 plugs per net, which are designed to cover the screw holes. However, these plugs had minor differences that were hard to spot, and without instructions it was impossible to know which plug should go where. Figuring this out took the longest - longer than installing the nets themselves!

First, the plug holes have a groove, so the plugs need to installed with the nose pointing in the right direction. But many times, the plugs simply didn't stay. It turned out that some of them were deeper than others, but again, it was not clear which should go where.

In the end, I just sanded down the backs of the "deeper" plugs, so they would snap in place.

Here is the end result:

SeatCargoNet-installed.jpg


I am pleased with the look, but I'm skeptical about the lower elastic - I don't think it is strong enough to keep things from falling out below. The EVANNEX solution would solve this problem, but it's not clear to me whether it comes with the matching plugs.