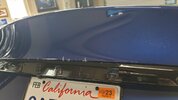
Welcome to Tesla Motors Club
Discuss Tesla's Model S, Model 3, Model X, Model Y, Cybertruck, Roadster and More.
Register

DIY PPF on 2022 Blue Model S

This site may earn commission on affiliate links.
Nice job! I DIYed the full hood in one piece (~$250 for Suntek Reaction) and that was doable, the front bumper I left that to the pros. Huge tip is wiping down every section after you squeegee to inspect before it completely tacks down. I have some bubbles but I know they will disappear in a few weeks.
 
Getting a lot better. I give a quality score of 99% on the lower hatch. As I mentioned in last post, inspect the piece as you go. Wipe off sections to inspect as you squeegee and fix where needed immediately. In this way, at the end of the piece its done. Waiting to the end to inspect will reveal defects more difficult to fix. I saw this method in practice in YouTube video
. Also, even if it's a brand new car, give it a claybar treatment. That will clean the surface of things you can't see.
 
The Model S front end is on ramps in preparation for PPFing the front bumper. The PPF pattern is weeded (precut patterns come weeded). I've been studying tack diagram and going thru the process in my head and on paper. The bumper has been clayed with a clay rag. Give me another day or two of contemplation. I'm not in a hurry, I'm retired. The only schedule I have these days is to put the trash out on Tuesdays. Except of course, my wife will be happy to be able to park in the garage again.
20220405_070551.jpg
 
Front bumper PPFed! It took me 8hrs. OMG. It turned out awesome. I give myself a 96%. With a difficultly handicap I give it a 99%. I'm very happy with it and the skill I have developed. The four seams are almost undetectable. Now to redo the hood. I know its not "paint perfecton film" but the hood has to be at least as good as the bumper. The hood redo will be a cake walk as compared to the front bumper.
20220407_141255.jpg
20220407_141241.jpg
20220407_141231.jpg
20220407_141215.jpg
 
Removing Xpel Ultimate went very smooth. The film was only about four days old and I kept it out of the sun. Start by unwrapping all the edges. Use a large towel and hot, not boiling water. Careful! The hood is aluminum and could dent. Don't pull like taking off a sticker. Pull towards you away from where you want it to come up. The film will stretch at the low angle and release. Roll up as you go. Cut, carefully, the long rolls periodically. There was some glue skid marks left, but not much. Carpro Ereaser and alcohol got the hood squeaky clean. The edges also need to be squeaky clean.
20220408_070542.jpg
20220408_073845.jpg
20220408_083215.jpg
20220408_083217.jpg
 
Hood redone, still not perfect but it's better, no more butt zits. I learned on this one that squeegee strokes need to overlap and be at an angle. I'd give it a score of 98%. Also did the upper rear hatch. Precut pattern had a seam all along the body line that is the width of the hatch. I did not want a seam so did it the bulk way, another first for me. Tack it to the side about where the body line is. Go on other side and stretch and tack until most of the fingers are gone above the Tesla bar. Then stretch again on other side to make remaining fingers as small as possible. I should have stretched even more because I had some stubborn fingers. Got 'em all down but it was a fight. I trimmed for 1/4" and was able to wrap and tuck all edges. Even around tail lights without taking them out. We'll see how the edges hold up over time. Oh yeah, i removed the Tesla badge. Bulk is ok but i think the two piece precut would've been ok too. I saw one and you cant even see the seem. Bulk won't fail at that seam area but the precut might. Unfortunately, or not, I am getting pretty good at extracting water with a syringe. It seems my eye cannot see large puddles in gradual valleys. Its ok, the needle is as small as it can be and the film is self healing. Next is the bumper.
20220409_144258.jpg
20220409_133348.jpg
20220409_133340.jpg
20220409_133333.jpg
 
Last edited:
  • Like
Reactions: 2101Guy
I am nearing the end of this PPF project. I have developed skills! I'm gonna have to find someone in the neighborhood to do their car. PPF is a challenge and very enjoyable. The front bumper took 8 hours, I did the rear bumper in just 3 hours. It was not as complicated. There are some more pieces but those will take about 2 hours. I do have a glaring error to fix on the lower part of the rear hatch. I have an idea, stay tuned.
20220411_100850.jpg
 
  • Like
  • Funny
Reactions: 2101Guy and All In
I fixed a pretty bad defect. Fingers above the Tesla bar on rear hatch would not cooperate. When doing bulk on upper part of hatch I did not stretch enough. I cut out the fingers and inlayed a fresh strip of PPF. Yup I used a knife on my Tesla! But I practiced first on the front license plate holder. Don't cut, score the PPF. You know your doing it right when the knife makes a squealing noise. After removing the fingers I use paper and pencil to trace pattern for PPF inlay. Turned out great. Fingers gone and you have to look real close to see the inlay seam. The pic shows the 1/4" not yet wrapped, waiting for it to dry.
20220411_150704.jpg
20220411_141548.jpg
 

Attachments

  • 20220411_141603.jpg
    20220411_141603.jpg
    258.3 KB · Views: 81
Last edited:
Fitting technique. I've never done PPF before and did not have a PPF master to guide me. Looking at the precut PPF patterns was not enough to figure out how some of the pieces fit. The wrap edges were easy enough. But how do the seams meet on the front bumper. Or how does that curved part seam up with its piece around the corner behind the wheel. It would be problematic to figure these out on the fly with wet PPF. It's best to have a plan. Use paper patterns and tape or place them on the Tesla (it's not a car, it's a Tesla). Place paper on top of the PPF precut pattern where you need to figure out placement. Then run a pencil back and forth to pick up the edges. Cut it out. Tape it or just place it on the Tesla to see how it fits. If it's a piece on both sides then it can be flipped over and tested on the other side of the Tesla too. Take your time. Look at it, visualize it, use paper templates.
20220412_073008.jpg
20220330_081224.jpg
20220320_144653.jpg
20220320_142901.jpg
 
Last edited:
  • Like
Reactions: DimaCA
Gtechniq Halo. It's a flexible ceramic coating just for PPF. It requires two coats. I've done the first coat on hood, front fenders, mirrors, head and fog lights and front bumper. I think I'm using too much product and too much is ending up on the leveling/buffing clothes. My 30ml bottle has just enough for second coat on these pieces! It's beautiful!
20220413_135803.jpg
 
  • Like
Reactions: oreobbq
Whooo weeee! I can say the gloss Xpel Ultimate Plus PPF application is complete! Full body and wear & tear areas. I took my time with this project, about two months. I am beaming ear to ear with how it turned out, just awesome! I spent four months of research while waiting for my deep blue metalic Tesla Model S Long Range. I learned a lot and gained some skills. My garage was transformed from leatherwork (my instagram @rnlleather, my website rnlleather.com) to Tesla detailing, PPF and ceramic coating. This was also an excuse for buying new tools. It doesn't take many tools for PPF. These are what you need: my favorite squeegees are 2 1/2" and 4" pink ones from Amazon, wet edge squeegee, 2" fusion hornet squeegee, diabetes syringe, ghost glove (2 of them), cuticle tweezers, nano skin auto scrub claying towel, gyeon clay lube, car pro Eraser, Johnson baby shampoo, 100% IPA, IK multi pro 2 pump sprayer (two of them), mercury double pump sprayer, Wagner heat gun, red dot knife, weeding/peeling board (4×8 cheap white board from home depot), paper and pencil for pattern mock ups, light head band, plenty of day light rated garage lights, tuck tools, PPF film, ceramic coating for PPF, lots of good quality micro fiber towels of different types from Rag Company ... and ... lots of research, practice and patience. I did not buy enough Halo ceramic coating. Wow, that stuff is awesome, it is so slick! More on order. Another important piece is a dust free garage. Every day the Tesla was pulled out early morning. The garage was blown out including overhead storage and the floor was dust mopped. I spent a whole month cleaning and decluttered before my Tesla arrived. It arrived to a dust free garage.
 
Gtechniq Halo. It's a flexible ceramic coating just for PPF. It requires two coats. I've done the first coat on hood, front fenders, mirrors, head and fog lights and front bumper. I think I'm using too much product and too much is ending up on the leveling/buffing clothes. My 30ml bottle has just enough for second coat on these pieces! It's beautiful!
Is there any reason that you went with this particular brand other than more widely used ones?