


Welcome to Tesla Motors Club
Discuss Tesla's Model S, Model 3, Model X, Model Y, Cybertruck, Roadster and More.
Register
Install the app
How to install the app on iOS
You can install our site as a web app on your iOS device by utilizing the Add to Home Screen feature in Safari. Please see this thread for more details on this.
Note: This feature may not be available in some browsers.
-
Want to remove ads? Register an account and login to see fewer ads, and become a Supporting Member to remove almost all ads.
You are using an out of date browser. It may not display this or other websites correctly.
You should upgrade or use an alternative browser.
You should upgrade or use an alternative browser.
rooter
Member
You have specified /dev/sdb (as opposed to /dev/sdb1, 2, 3, 4 for individual partitions), and assuming that you do end up with an ~8GB file at test.img, that will be a dump of the whole chip. (Assuming there were no errors -- look carefully at the results for this)
A full chip dump is my preferred method for getting your data. When you have this, use the above kpartx procedure to get access to the individual partitions inside the image.
If all has gone well, guard this 'Golden Image' and make backups of your backups of it.... until your next firmware upgrade when you'll pull a new Golden Image. I name my images by version and scope, such as 18.24-mmcblk0.img, 18.24-mmcblk0p3.img, etc.
And also pull partitions 3 & 4 individually and make backups to your backups -- in different places. My backups server is in the basement, well away from everything else in case of fire or theft.
Once you've changed your eMMC to an industrial-grade chip, you won't have to worry about that problem for the life of the car (or your life, whichever is shorter).
Last edited:
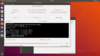
Did you dump the full chip into one image file? If so you can't mount the individual partitions in it directly. You have to first put them into loop devices:
# kpartx -a mmcblk0.img
# mount -o loop /dev/mapper/loop0p1 /mnt
... etc
# umount /mnt
# kpartx -d mmcblk0.img
when i use i have to put in front sudo and i get error failed stat() test.img
rooter
Member
I'm too drunk to deal with this now.
stephtech
Member
I succeeded in reading my chip without desoldering ") .
.
It is now too late to document how, I will tomorrow night.
important things: Transcend USB reader (TS-RDF5K) IS working, none of my 3 others (generic) did, so order one if you want have a known compatible reader (cheap, about 10$)
I also needed pullup/pulldown resistors and I also needed to crank current up to 1.1amps (instead of the typicial 750-900ma). Voltage is also a bit higher, I set it at 3.0V.
will update thread tomorrow night. Also note that these are just preliminary conditions so I was able to read my chip. I will optimize/change resistor values based on signal quality/amplitude (using logic analyser + oscilloscope)
so now, back to reassemble the MCU, I need the car for my commute to work...
. It is now too late to document how, I will tomorrow night.
important things: Transcend USB reader (TS-RDF5K) IS working, none of my 3 others (generic) did, so order one if you want have a known compatible reader (cheap, about 10$)
I also needed pullup/pulldown resistors and I also needed to crank current up to 1.1amps (instead of the typicial 750-900ma). Voltage is also a bit higher, I set it at 3.0V.
will update thread tomorrow night. Also note that these are just preliminary conditions so I was able to read my chip. I will optimize/change resistor values based on signal quality/amplitude (using logic analyser + oscilloscope)
so now, back to reassemble the MCU, I need the car for my commute to work...
stephtech
Member
where did you put that pullup resistor ?
so far:
4.7K (10K should do) pulldown: D3 (CS)
1K pullup to VDD (SD card 3.3V): CMD
1K pullup to VDD (SD card 3.3V): D0
working only in 1bit mode
will have to get more details tonight....out of time
i have only one file not 4 of themYou have specified /dev/sdb (as opposed to /dev/sdb1, 2, 3, 4 for individual partitions), and assuming that you do end up with an ~8GB file at test.img, that will be a dump of the whole chip. (Assuming there were no errors -- look carefully at the results for this)
A full chip dump is my preferred method for getting your data. When you have this, use the above kpartx procedure to get access to the individual partitions inside the image.
If all has gone well, guard this 'Golden Image' and make backups of your backups of it.... until your next firmware upgrade when you'll pull a new Golden Image. I name my images by version and scope, such as 18.24-mmcblk0.img, 18.24-mmcblk0p3.img, etc.
And also pull partitions 3 & 4 individually and make backups to your backups -- in different places. My backups server is in the basement, well away from everything else in case of fire or theft.
Once you've changed your eMMC to an industrial-grade chip, you won't have to worry about that problem for the life of the car (or your life, whichever is shorter).
rooter
Member
Word42, you're 90% there, although without knowledge of Linux I just don't have time to take you further.
You appear to have the .img dump on your laptop, but have not confirmed that it is almost 8GB. Is it almost 8GB? And it is not clear whether you have named your file test.img or mmcblk0.img. I am going to assume test.img .
In your prompt is a $. This means that you are logged in as a regular user. You have two choices now:
$ sudo -i
Password:
#
This elevates you to being the root (super) user. You can normally only mount files as root.
# kpartx -a test.img
# mount /dev/mapper/loop3 /mnt
(Do what you have to do)
# umount /mnt
# kpartx -d test.img
(You never type the #... the system will ignore you. The system provides the #)
Or:
$ sudo kpartx -a test.img
Password:
$ sudo mount /dev/mapper/loop3 /mnt
Password:
(Do what you have to do)
$ sudo umount /mnt
Password:
$ sudo kpartx -d test.img
Password:
This process is another which has never been documented, and I am now building an article on a related issue and will include this info. My methods may be different than the way others have done it as I've had to come up with it on my own, but it works every time, is proper, and is reliable.
Last edited:
kpartx -a ( file path) i get this point very well
but this command mount /dev/mapper/loop3 /mnt gives me cant find in etc/fstab ( does it mean that it does not find any known file system )
edit: ok i forgoted sudo -i
mount /dev/mapper/loop3 /mnt i get
mount: /mnt: special device /dev/mapper/loop3 does not exist
but this command mount /dev/mapper/loop3 /mnt gives me cant find in etc/fstab ( does it mean that it does not find any known file system )
edit: ok i forgoted sudo -i
mount /dev/mapper/loop3 /mnt i get
mount: /mnt: special device /dev/mapper/loop3 does not exist
Last edited:
Do a 'ls' in /dev/mapperkpartx -a ( file path) i get this point very well
but this command mount /dev/mapper/loop3 /mnt gives me cant find in etc/fstab ( does it mean that it does not find any known file system )
edit: ok i forgoted sudo -i
mount /dev/mapper/loop3 /mnt i get
mount: /mnt: special device /dev/mapper/loop3 does not exist
It's probably /dev/mapper/loop0p3
The main problem is your Linux knowledge here. Not a negative word, but without that knowledge it will be difficult to do this.
Similar threads
- Replies
- 8
- Views
- 2K
- Replies
- 3
- Views
- 782
- Replies
- 1
- Views
- 2K