Welcome to Tesla Motors Club
Discuss Tesla's Model S, Model 3, Model X, Model Y, Cybertruck, Roadster and More.
Register

2021 Refresh Tail Lamp and Charge Port Retrofit Project

This site may earn commission on affiliate links.
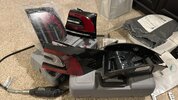
So whos gonna be the first to post photos? I have access to both generations of tails and I'd like to get a bit better of an idea of whats involved with swapping the LED internals into a set of 2013 tails. Wiring connections the same?
well, so far only two people in this thread has done the retrofit (swapping internals no metal cutting) so far. perhaps they could post some DIY
pics ? i'm still waiting for parts, so i cant start yet.
 
Last edited:
Some goodies arrived today. what’s the best way to open these up ? Baking ? Heat gun ? If so what temp and how long ?

A83C0E39-F046-45CC-BF3C-E52C26A07975.jpeg
 
Last edited:
  • Like
Reactions: acarlos1000
For the new ones you'll want a Hot Knife or Dremel. They are plastic welded. Be very careful around the seam on the bottom and inside edge (trunk side). There isn't a lot of space for mistakes...

The old ones you'll want a heat gun and a screwdriver. Heat up the seam till it's warm to the touch but not burning and then tap the butt end of the screw driver on the black plastic frame to break the seal.
 
Last edited:
  • Like
Reactions: Daytonaviolet
For the new ones you'll want a Hot Knife or Dremel. They are plastic welded. Be very careful around the seam on the bottom and inside edge (trunk side). There isn't a lot of space for mistakes...

The old ones you'll want a heat gun and a screwdriver. Heat up the seam and then tap the butt end of the screw driver on the black plastic frame to break the seal.
just to be clear, which one is new ones and old ones ? new ones are the refresh inner lights right ? so it's okay to hack up the outer shell as we only care about the insides. the old ones are the ones which we care about the outer shell. the outsides of these need to stay in good condition.

so no oven ? heat gun may take some time :)
 
Some goodies arrived today. what’s the best way to open these up ? Baking ? Heat gun ? If so what temp and how long ?

View attachment 907939
From my experience using an oven is effective. I usually set it super low and work my way up in temperatures. Generally you want to use the lowest temperature but longest baking time that way the heat can fully penetrate the sealants. One thing I would recommend is to avoid prying too much, it may deform the housing making for resealing difficult.
 
From my experience using an oven is effective. I usually set it super low and work my way up in temperatures. Generally you want to use the lowest temperature but longest baking time that way the heat can fully penetrate the sealants. One thing I would recommend is to avoid prying too much, it may deform the housing making for resealing difficult.
yea i was thinking same thing. perhaps 220 fahrenheit @ 10min ? from what i saw on youtube some glues may have a higher melting point then the plastic. also some may even be plastic welded. not sure what method tesla used ?
 
yea i was thinking same thing. perhaps 220 fahrenheit @ 10min ? from what i saw on youtube some glues may have a higher melting point then the plastic. also some may even be plastic welded. not sure what method tesla used ?
That sounds about right, generally tail lights aren’t as tightly sealed as headlights are so you may not need that long. Just keep an eye on the plastics to make sure nothing starts melting, they can take a decent bit of heat before going bad
 
New ones are the refresh taillights. Old ones are pre-refresh. :)

Oven works fine too... some people set that stuff at 400 though and melt parts. You need to know what you're doing. I also don't recommend prying the lense will pop loose with enough heat/force applied. It's a delicate process.
 
  • Like
Reactions: Daytonaviolet
I have one that is… but it was/is a test run/junk unit that I was using to experiment. I was going to buy another set to do the actual transfer after figuring it all out. Lense is all scratched up and the tip of the lense is broken.
 

Attachments

  • 13E7F0A9-7025-4689-993F-3163552616D5.jpeg
    13E7F0A9-7025-4689-993F-3163552616D5.jpeg
    489.9 KB · Views: 153
  • Like
Reactions: Daytonaviolet
So did the lense break when taking it apart ? Did you use heat gun or bake ?
I used the method described above with a heat gun and screw driver. My wife isn’t a fan of car or computer parts in the oven. Use what works for you.

It took me a while during it my way. The lense was a scrap yard part and was damaged when I bought it, but I knew that.
 
  • Like
Reactions: Daytonaviolet
I used the method described above with a heat gun and screw driver. My wife isn’t a fan of car or computer parts in the oven. Use what works for you.

It took me a while during it my way. The lense was a scrap yard part and was damaged when I bought it, but I knew that.
I will open the refresh light first to get some experience. Then what I learn from that I’ll apply to the pre-refresh light. Cracking or breaking the tips is main concern.
 
  • Like
Reactions: leecox