Welcome to Tesla Motors Club
Discuss Tesla's Model S, Model 3, Model X, Model Y, Cybertruck, Roadster and More.
Register

Definitive S Refresh Front Plate Bracket Removal

This site may earn commission on affiliate links.
I just took mine off today...I'd say that they are on a bit too tight to totally just use your fingers. However, you only really need to get about a couple turns on them and then you can grip them and twist them off the rest of the way. I used the angled pliers from Amazon to do mine.
 
Just curious, can I just use my hand and unscrew the security screws or do I need to use a wrench with the adapter?

Some have claimed to be able to do it by hand. I could not. Regular Torx and sockets don't work because these screws are pentalobe. 5 sided. I had someone send me their removed screw and i measured it to make the 3D CAD model of the socket. It's hard to grab with pliers (I found) because you can't get the plier jaws 180 degrees apart. So you're gripping the screw off center. Plus it's in an area where there's not much vertical access.
 

Attachments

  • Screen Shot 2017-02-26 at 11.00.33 PM.png
    Screen Shot 2017-02-26 at 11.00.33 PM.png
    173.6 KB · Views: 154
After my 90 degree pliers came in I removed the ugly front plate. I just loosened the security bolts a few turns and then finished taking them off by hand. I also used the 90 degree pliers to pull off the black bracket. It was hard to start the pealing process but once you get it going it jut pops right off and its very easy to cleanly roll off the extra double stick tape.
 

Attachments

  • IMG_0578.JPG
    IMG_0578.JPG
    337.5 KB · Views: 115
Some have claimed to be able to do it by hand. I could not. Regular Torx and sockets don't work because these screws are pentalobe. 5 sided. I had someone send me their removed screw and i measured it to make the 3D CAD model of the socket. It's hard to grab with pliers (I found) because you can't get the plier jaws 180 degrees apart. So you're gripping the screw off center. Plus it's in an area where there's not much vertical access.


Thanks! Actually, I meant to check if I could use the adapter with my hands or if I needed a wrench.
 

I bought this and it's well worth the very small cost just for ease of use

One thought/question :

I was thinking about the possible need to temporarily reinstall the plate
It would seem to be quite easy but I'm wondering if I could just get some reasonably thick foam tape and use that to rest and cushion the license plate holder against the car paint, instead of using something like the original gooey stuff
 
  • Love
Reactions: James Anders
Another big +1 for this thread. Removed my front plate holder in 10 minutes as if it were never there.

I used the $4 plastic adapter at Tesla License Plate Socket Adapter by SlippinJimmie on Shapeways on a standard Allen wrench to loosen the star screws and then finish them by hand. Used a blow dryer on high for 60 seconds and the oft-described "gently firm" pull on the adhesive. Just leaning back with my body weight for two or three minutes started a corner well enough for a good grip, and it was another minute or two of steady pressure to finish it. The adhesive rolled off cleanly under my thumb, and the very faint lines came right off in one wipe of Goo Gone. Washed the whole thing down with car wash, and it looks perfect. Thanks to all who contributed to this thread.
 
  • Love
Reactions: James Anders
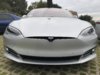
Lot of speculation/incorrect information floating around. I removed the front plate bracket today and it was fairly painless. Wanted to share what works and what doesn't.

THESE DO NOT WORK, DON'T WASTE YOUR MONEY...
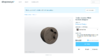
  • Cutting a groove into screw head for a flat blade driver
    • See:
    • Ok, I guess this works, but bringing a rotary blade anywhere near your paint job, ARE YOU CRAZY?
BUT, THE FOLLOWING DOES WORK, AND IT'S EASY!

1. Buy yourself one of these: TEKTON 34233 7-Inch 90-Degree Bent Long Nose Pliers - - Amazon.com
2. Make sure you can see the screw. This is key to getting a good grip. My garage is dark so I taped a small mirror to the back of my iPhone and used the rear-facing flash to illuminate the screw. I rested the iPhone face down on the lower lip of the front fascia so I could see what I was doing in the mirror.
3. These 90-degree bent pliers let you grip the penta-point screw head at 4 and 8 o'clock to turn the screw. I found they were not torqued at the factory very tightly, so it was easy to loosen them. I did a few turns with the pliers, and then could unscrew the rest of the way with my fingers.

Attached are detailed pictures of how the pliers should grip the screw head.

Good luck!

View attachment 179450 View attachment 179451 View attachment 179452 View attachment 179453


View attachment 179449
OK - I must be a complete spaz but this tool doesn't work for me. Very frustrated. Tesla store did not let me borrow the needed Torx tool either
 
I was able to get it off with just my hands- got some leverage with my fingernail on a small defect/seam on the side of each screwhead and then like others have reported, it was simple after just a few turns. was able to work the plastic tool from the AbstractOcean LED replacements in to separate enough adhesive to get things moving when pulling the holder off afterward!
 
Based upon the video can't you just heat up the plate and bypass all of the unscrewing each panel?

You have to take out the bottom screws, but I agree, the rest aren't necessary as long as it's a warm enough day and you can apply some additional heat. I took mine off in March, in Michigan when it was 30 or so degrees outside. So I had to take more of it apart in order to get it done.
 
My method used on my May delivery S:

1. Tried loosening the two screws at the bottom (sort of deep inside the bumper cover opening) by hand. No go.

2. Used a Dremel tool to cut a slot in the head of each screw. Took about 2 minutes.

3. Stubby flat blade screwdriver to remove screws (Need stubby as the vertical distance underneath the screws is short).

4. I loosened the other screws on the face a little bit, but not all the way. I think it's easier to pull the black plate off if it's still attached to the main body color piece. I heated things up a bit with a hair dryer.

5. Some of the adhesive foam remained. I just used fingers and finger nails to carefully remove.

This is a good approach if you have a Dremel and don't have any other tool that will fit (I tried a variety of other tools I had but nothing worked very well).

The down side is that the Dremel made some nicks on the opening where the two underneath screws go. This didn't bother me as I don't intend to ever use the piece again, and even if I did those nicks don't show at all.

And this can't be emphasized enough: The car looks SO much better without the front plate holder. If your state is picky about front plates, you should move!
 
New member. Thankful for this thread!

Bit of a struggle, but the pliers mentioned on the first page were key. Adhesive was steadfast but broke its will with a plastic putty knife to get things going...Rest of the way was pretty easy. It was a hot humid day in Georgia; maybe that helped...the small residue easily released just by dabbing with the adhesive wad.

Thanks guys!
 
I loosened the other screws on the face a little bit, but not all the way. I think it's easier to pull the black plate off if it's still attached to the main body color piece.

Thanks for this suggestion!

By leaving the main body color piece attached to the black plate, I had good leverage to use in loosening the adhesive on the black plate. I didn't apply any heat at all (unless you count the heat we get for "free" from summer in North Carolina). I just pulled slowly and firmly on the upper right corner until the black plate separated from the car body enough for me to get my fingers between the black plate and the car body. No putty knife needed. No hair dryer or heat gun needed. Just elbow grease.