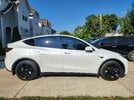
Here is my review of the LASFIT wheel covers and how they compare to the Rimetrix Laminar wheel covers for the Model Y. I’ve been running the Rimetrix Laminars for the past year and just received the LASFIT wheel covers to review.
Disclaimer: LASFIT provided the wheel covers to me for review, but these opinions are my own.
Product Overview:
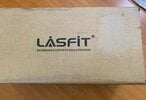
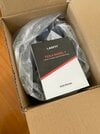
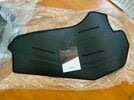
The wheel covers I reviewed are for the 2020 - 2023 Model Y with 19” Gemini wheels. The color is stated as matte black, but more on that later. The wheel covers come packaged very well in a box with “Made in China” stickers covering multiple sides. Each wheel cover is in it’s own separate box surrounded in 3 layers of different protective wrap. These wheel covers will not be damaged in transport, the amount of protective packaging for each wheel is almost absurd. Inside each wheel cover box you’ll find the foam tape that needs to be installed around the circumference of the wheel cover.
View attachment 966300
For those of you who like weights:
OEM Gemini: 1.12 lbs
Rimetrix: 1.13 lbs
LASFIT: 1.16 lbs
Price:
Rimetrix Laminar: $259
LASFIT: $199
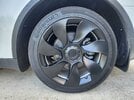
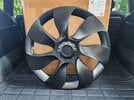
Looks:
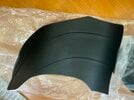
Below you’ll see a comparison of the OEM Tesla Gemini, LASTFIT, and Rimetrix Laminar wheel covers (left to right). The LASFIT is definitely more turbine inspired then the straight lined Rimetrix Laminar. I’ve always been a fan of the looks of the Rimetrix Laminars, but the LASFIT are good looking and what you prefer will be more of a personal preference then anything else.
View attachment 966296
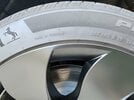
The color of the LASFIT’s is stated as matte black. But when comparing them side-by-side, they appear to be more of a dark grey or lighter black compared to the deep black of the Rimetrix. While installed on the car though, they do appear black.
View attachment 966301
Note: Neither the Rimetrix or LASFIT wheel covers come with the Tesla logo on the center caps. These can be purchased from Amazon.
Installation:
Both install and remove similar to the OEM Gemini wheel covers. But, the ease of installation is what really separates the LASFIT from the Rimetrix.
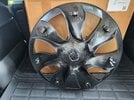
Rimetrix:
The wheel cover is two parts, the wheel cover and a center cap. You install the wheel cover by snapping it on the Gemini wheel. You then install the center cap to lock it all in place. The issue is the center cap is difficult to remove. The instructions Rimetrix give makes it seem like you can use a plastic pry tool, but you can’t. You need to take a small flat head screw driver and pry up the center cap working your way around until it comes loose. This of course leaves gouges in the center cap and wheel cover, no matter how gentle you are.
The other issue is if you ever get a flat, you won’t be able to remove the wheel cover to access the lug nuts unless you have something to pry that center cap off with. This to me has always been a major con of the Rimetrix wheels.
View attachment 966330
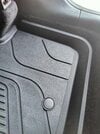
LASFIT:
The LASFIT wheel covers are one piece, wheel cover and center cap similar to the OEM Gemini wheel covers. You just snap them on to the Gemini wheels, to remove you just pull and they come off.
Summary:
The Rimetrix Laminars have held up well over the past year. But, based on the price and ease of installation, the LASFIT wheel covers would be my recommendation. The only con I have with the LASFIT’s is the fact that you have to install the foam tape on each wheel cover. The Rimetrix is the same way, I just wish they came preinstalled. The Rimetrix Laminars are one of the original Model Y wheel covers, but the design incorporating a separate center cap is unnecessary and makes the installation and removal difficult. That is a major design issue, along with the higher price, it would be difficult to recommend them over the LASFIT wheel covers.