Welcome to Tesla Motors Club
Discuss Tesla's Model S, Model 3, Model X, Model Y, Cybertruck, Roadster and More.
Register

Model 3 subwoofer install.

This site may earn commission on affiliate links.
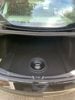
Lived in Charlotte for close to 30 years, great city. I'm curious as to what this LC2i device is you're talking about, and how I'd go about getting one installed? Just took delivery of my M3 2 weeks ago, and while the premium sound system sounds great, the sub in the trunk is barely even audible, looking for a quick way to boost it until I can figure out a more audiophile-oriented solution. Open the trunk, and it's fairly decent sounding when you stick your head in. Close the trunk, it may as well not even exist inside the cabin in the front seats. From what I've read about the device you mentioned, seems like it'll at least boost it enough to somewhat hear inside.
The LC2i is just a fancy line out converter. It needs a 12V power source, I just tapped in the same spot as my aftermarket amp. It has its own customizable gain, and also a bass boost that is frequency and level selectable. So, in my car, I've set it to boost anything at 40hz and below, which brings back a little bit of the lower end that gets severely attenuated by the stock system. I am typically not a fan of bass boost, but in this case it is warranted as the lower end is normally almost completely muted.
 
Hi! Interesting thread! A few questions;

1. Does the Model 3 OEM Head Unit give line-outs for the subwoofer? If so, is it pre- or post filter?
2. Are there any specs on the OEM subwoofer amp and speaker element?
The head unit (which is really just part of the main computer) sends a digital signal to the rear amp that has all the channels in a single line, post-filter. The OEM subwoofer is rated at 80W x 2, 4Ohm X 2 (dual voice coil).
 
  • Informative
Reactions: tracksyde
Yes, you'd have to find somewhere else to tap into the audio signal. The front door woofers are a prime candidate, but are probably missing some of the extreme low end. You could use an LC2i or other LOC/DSP to compensate.
I also have a standard Plus with no wiring to the rear I understand you are suggest using the rear door speakers and a LC2i to add a sub in the rear but where do you think I can get 12V to power the LC2i
 
I also have a standard Plus with no wiring to the rear I understand you are suggest using the rear door speakers and a LC2i to add a sub in the rear but where do you think I can get 12V to power the LC2i
The DC-DC converter has a post under the rear passenger seat that can provide more than enough power. You'd be tapping your aftermarket amplifier here, too. Removing the seat is actually really easy, and it's a short run to the trunk from there. There are videos showing you how to remove the seat.
 
Everyone -
Just completed a sub-woofer upgrade installation to my 2 week old Model 3. Yes, the premium audio system is amazing, though certainly lacks enough low-end to satisfy the discerning ear. After reviewing videos and scouring the boards for ideas, I undertook the install which only lasted a couple of hours. That said, the install is fairly simple and you'll be amazed with the end result. Here are the steps:

Purchase the following items:
  1. Remove plastic trunk edge strip and the 3 connectors holding the trunk carpet in place. No need to remove the carpet section entirely as you'll be able to route the power wires (amp line & 12-volt for the LOC) easily underneath the carpet and up to the 12-volt connection under the rear seat on the right side of the vehicle. BTW - You'll need to remove the rear seat bottom as well. See the video on how to remove each of these item near the top of this thread.
  2. Once the power is routed, cut a small hole in the lower truck section of the carpet and pull the amp power line through as well as the amp ground and amp turn-on wire from the LOC, and finally, the RCA jack line.
  3. Prep the PAC LOC by installing butt connectors on the wires.
  4. On the LOC wire harness, you'll need to cut off 1 set of RCA jacks and strip the wires back about a 1/4".
  5. Locate the Model 3's sub-woofer and amp in the rear right corner (again, see the aforementioned video) and unplug the wire harness going into the sub-woofer box.
  6. Using the Posi Taps, install one on the green wire (pos) and one on the orange wire (neg).
  7. install the positive & negative speaker lines off of the LOC to the Posi Taps. This will carry you signal to the LOC.
  8. Connect the 12-volt line to the LOC.
  9. Splice on a couple feet of 18 gauge wire to the 12-volt turn-on on the LOC wire harness and run that line also through the lower trunk section with the other wires.
  10. In the rear, under the carpet section, grind off a 1"x1" section of the Model 3 metal to situate the ground for the amp & LOC. I used a Dremel tool with a grinder bit to perform this.
  11. Secure the ground lines with a self-tapping screw.
  12. Plug the RCA jacks from the amp, into the LOC.
  13. Situate the loaded sub-woofer enclosure into the lower trunk, as well as the amp. I installed my amp on top of the enclosure, as I had plenty of room.
  14. Finish wiring up the amp and re-install 2 of the clips to hold the carpet section to the body of the car.
  15. Check and double check your work, ensuring all connections are correct and secure.
  16. To make the final power connection; locate the 12-volt batter source (see video) and remove the red cap to provide access to the positive post.
  17. Using a ring connector, secure to the stripped end of the amp power cable & LOC 12-volt cable.
  18. Before installing on the positive power post, make sure that the interior lights are not on and that nothing is being displayed on the dash screen.
  19. Make the connection and secure with a properly sized nut.
  20. Back in the trunk, reconnect the Model 3 sub-woofer wire harness back into the OEM sub-woofer.
  21. Turn the LOC adjustment down all of the way.
  22. Adjust the amp controls to 12 o'clock.
  23. Play a song with some solid bass, as well as some quiet sections of the song and adjust the LOC until you have sound at the new sub-woofer.
  24. Adjust further until there's some distortion and then back off slightly until the distortion is gone.
  25. Make final adjustments on the Rockford Fosgate amp settings to your liking.
  26. Button up everything (rear seat bottom, carpet, etc.).
  27. Enjoy!
This was my absolute same idea on a setup, and THANK YOU for getting a detailed DIY instructions on it.
 
Thanks to everyone in this thread! I completed a full DIY install of an Alpine 300w RMS amp and a Pioneer shallow mount sealed 12" 4ohm sub this weekend! Happy to assist anyone in doing the same. If you're in the Los Angeles area, I'd be happy to meet up and help out if needed!
Interested in doing the same. Did you use the Pioneer TS-SWX3002? What specific Pioneer amp? How did the install go?
 
Interested in doing the same. Did you use the Pioneer TS-SWX3002? What specific Pioneer amp? How did the install go?

Yes, the same 12" subwoofer. I chose the Alpine MRV-M500, but it is WAY too much for the car! The gain is set at half. Installation was pretty easy overall. I paid a lot of attention to the routing of the power wire, and grounded the amp directly against the trunk sheet metal (after grinding off the primer paint). I fabricated a bracket to hold the amp upside down with airflow between the bracket and the amp. I secured the bracket and ground with sheet metal screws in the trunk to keep the ground as short as possible. Sound is GREAT! I'm still dialing in the EQ and LPF with various types of music, but I am almost there. The information previous to this post in the forum has all the info you need. Removing the back seat, etc. I tapped the stock sub wire and used it as high level input, thus avoiding the need to go with the LC2i. The high-level input functions as the remote on. Any more questions, I am happy to help!
 
Yes, the same 12" subwoofer. I chose the Alpine MRV-M500, but it is WAY too much for the car! The gain is set at half. Installation was pretty easy overall. I paid a lot of attention to the routing of the power wire, and grounded the amp directly against the trunk sheet metal (after grinding off the primer paint). I fabricated a bracket to hold the amp upside down with airflow between the bracket and the amp. I secured the bracket and ground with sheet metal screws in the trunk to keep the ground as short as possible. Sound is GREAT! I'm still dialing in the EQ and LPF with various types of music, but I am almost there. The information previous to this post in the forum has all the info you need. Removing the back seat, etc. I tapped the stock sub wire and used it as high level input, thus avoiding the need to go with the LC2i. The high-level input functions as the remote on. Any more questions, I am happy to help!

Thanks,

Decided to go with the 10” model and the M250. Doing the install this weekend. Planning on installing the amp directly on the box and trying to use the same ground as the stock amp. I’ll let you know how it goes. :)
 
Thanks for all the info in this thread! Just finished installation in my SR+ Model 3. I duplicated the sub trunk well cover with a sealed box attached below it. Wrapped in black felt so it looks like it belongs
 

Attachments

  • BACE7C73-5DD1-498B-9874-DFA1377533D8.jpeg
    BACE7C73-5DD1-498B-9874-DFA1377533D8.jpeg
    478 KB · Views: 1,076
Have this in another thread I started, but thought i'd share. Did a similar setup using the sub trunk, but had a custom box made fitted with 1" acrylic and the cover is still usable in case I need to use the trunk space for any reason. I'm still amazed on the fitment and the overall sound improvements it's made even with the stock speakers. May replace the back passenger one's at some point, but for now i'm a happy camper.
20190605_140301.jpg
 
Have this in another thread I started, but thought i'd share. Did a similar setup using the sub trunk, but had a custom box made fitted with 1" acrylic and the cover is still usable in case I need to use the trunk space for any reason. I'm still amazed on the fitment and the overall sound improvements it's made even with the stock speakers. May replace the back passenger one's at some point, but for now i'm a happy camper.View attachment 418877
That looks super clean. Congrats!
 
  • Like
Reactions: T3SL4AFBruh
Have this in another thread I started, but thought i'd share. Did a similar setup using the sub trunk, but had a custom box made fitted with 1" acrylic and the cover is still usable in case I need to use the trunk space for any reason. I'm still amazed on the fitment and the overall sound improvements it's made even with the stock speakers. May replace the back passenger one's at some point, but for now i'm a happy camper.View attachment 418877

That is very clean! Did you build this yourself or take it to a shop?
 
Have this in another thread I started, but thought i'd share. Did a similar setup using the sub trunk, but had a custom box made fitted with 1" acrylic and the cover is still usable in case I need to use the trunk space for any reason. I'm still amazed on the fitment and the overall sound improvements it's made even with the stock speakers. May replace the back passenger one's at some point, but for now i'm a happy camper.View attachment 418877
This is the best one ive seen. Very nice!!
 
  • Love
Reactions: T3SL4AFBruh
Have this in another thread I started, but thought i'd share. Did a similar setup using the sub trunk, but had a custom box made fitted with 1" acrylic and the cover is still usable in case I need to use the trunk space for any reason. I'm still amazed on the fitment and the overall sound improvements it's made even with the stock speakers. May replace the back passenger one's at some point, but for now i'm a happy camper.View attachment 418877
How are you getting the audio signal? What is the amp connected to (the terminal under the rear seat?)
I like that design I would love to have something similar only without the acrylic etc (I like it but I also like stealth). black felt or carpet would be perfect.