Welcome to Tesla Motors Club
Discuss Tesla's Model S, Model 3, Model X, Model Y, Cybertruck, Roadster and More.
Register

Quikr Mach 2 hitch rack

This site may earn commission on affiliate links.
Thank you so much for all the pics.

The issue is to lose as less as possible trunk space when caring the rack inside the trunk. It seems
that the best location is to have the two pieces (the main holder and the add-on) just behind the rear seat.

I have only road bikes, with 700c wheels, so the wheels will go far away on each side.
I would then prefer to remove the front wheel and attach the fork axial directly to the rail.
Some thing I would have to figure out.
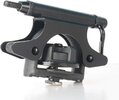
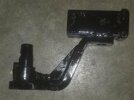
51GMOyKaKEL._AC_SL1000_.jpg

An other issue that I am considering is to install some additional lights
attached to the rack because the car's rear lights get obstructed.

CURT 53201 LED Light Strips for Hitch .jpg
 
Last edited:
Hmm. The rack arms that grab the bike are designed to secure the wheel, so if you remove a wheel and attach the fork to the tray, I'm not sure how the arms will hold the bike.

The Model Y (with mirrors) is 83.8" wide. All four of our bikes are shorter than that, so I don't think your bike will extend past the car. It looks like they do in the photos above, but it's the camera angle.

As for the lights, that's a great idea; in fact I have that same light set in my shopping cart. But with the Quikr rack installed, I don't think there is room to plug it in (especially since you'd have to use a 7-to-4 pin adapter). Sorry.
 
Last edited:
I know this is the Model Y forum, but for those that also have an X, or are thinking about an X, or are X owners searching for Quikr information that found this, or are curious which issues are specific to the rack and which are specific to the car...here are some photos of the rack on our Model X.

First, here's a top view with the rack installed in the receiver. Note that there's plenty of room to access the safety pin (although I've already removed it). The only possible issue is that you can barely see about 1/8" of the second 1" silver "pressure pad" that holds the rack in the receiver. It's supposed to be all the way inside the receiver, but I feel pretty confident this will hold well.

IntoReceiver.jpg


Here's the rack in the stowed position. On the X, you can open the hatch like this.

Stowed.jpg


Here's a side view of the rack in the stowed position. There's a lot more room between the rack and the X.

Stowed, side view.jpg


And here it is with a bike on it.

WithBike.jpg
 
@ChadS Thank you for all those pics.
So you take the red bike when using the grey car, and a grey bike when using the red car!

I guess, you didn't orderd the add-on carrier.
Do you thing it would have been too heavy for the tow hitch to have two e-bikes?

Note: I was curious about the meaning of your personalized license plates?

BTW, I went biking on the San Juan Islands last summer. The Orcas island was certainly the most challenging.
 
Good guess on the colors :) but the red bike is my everyday ride-from-home and errand bike, and the grey bike is quite a bit lighter so I take it when I'm putting something on a rack.

You are correct that I don't have an add-on carrier yet; we have another 2-bike rack, and my wife's bikes fit inside her car. But I think I will probably order the add-on and then sell my other rack. I don't think weight will be a problem...my "travel" e-bike isn't that heavy, and my wife's conventional bikes are a lot lighter.

I edited the license plates (no meaning); those aren't the real ones.

The San Juans have some great biking!
 
Regarding your fendered bikes, a possible solution,
if you have plastic fenders and not metallic ones, is to loosen the bolts holding the fenders.

So you can then get a tight fit by pushing the fender up to the tire using the bike rack arm.
To avoid scatching the fender you could use some padding, 1UpUsa has a special one which should certainly fit,
but it would be easy to make a custom one.

Bike With Finders .jpg


Fender-Cushion .jpg
 
Last edited:
  • Like
Reactions: ChadS
I found that if you use pipe insulation with the rear fenders, it solves the problem. You can either put it around the fender or put it between the fender and the tire. This is what 1-UP racks use for fenders on bikes. I have the Quikr Rack as well and an ebike with full fenders and there's enough space between the tire and the fender that I put the pipe insulation with velco to keep it in place. Then I can tighten the arm of the rack on it without having to change the length. This works really well.
 
  • Like
Reactions: ChadS
I won't say it's impossible, but it isn't going to be easy.

This would be dead-simple on a Model X (see photos from my last post above) because the X's receiver sticks a couple of inches out from the bumper. But with the Y's recessed hitch design, plus the QuikrStuff's big flat bar that pushes in to it (very different from the design of the rack you posted - and it has to be pushed in all the way to get the "pressure pads" inside the receiver), there's almost no room to access the 7-pin outlet.

Here's the business end of the Quikrstuff rack. Note that the pressure pads on the stinger start about an inch from that big wide bar that's perpendicular to the stinger, and the Y's receiver is about 1" inside the bumper. So that wide bar has to be pressed all the way up to the bumper:

QR2000Hitch-Only.jpeg


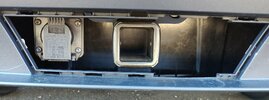
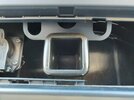
Here's a photo of the Y's receiver and 7-pin outlet with nothing installed. And then a photo from the same location with the QuikrStuff rack installed:

OpenReceiver.jpg


RackInTheWay.jpg


This photo is from the other side - here's what you can see of the 7-pin outlet when the rack is installed:

AccessTo7pin.jpg
 
This photo is from the other side - here's what you can see of the 7-pin outlet when the rack is installed:

View attachment 861761

Thank you for the detailled pictures.
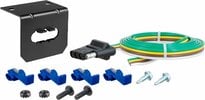
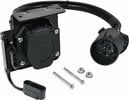
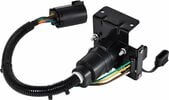
Maybe tapping the wires and installing a separate 4-wires plug attached to the 7-wires plug would be a possibility.

4-Wires Kit .jpg Oyviny Multi-Tow Wiring Harness 02 .jpg Oyviny Multi-Tow Wiring Harness 04 .jpg

I noticed that the chain location might then interfer, so the 7-wites plug would need to be rotated to find the best location of a 4-wires plug.

Tesla-Model-Y-tow-hitch.jpeg Tesla Model Y factory-installed tow hitch 03 - Chains .jpeg

Otherwise just hanging the 4-wires harness on the side using a magnet could be simpler.
 
So tempted to get this rack. Torn between this and the 1 up super duty. Price diff is $1879 vs $1040. The tool less appeals to me a lot cause I can easily take it on and off each time. But that $839 nearly 2x the cost is a killer.

On the other hand, there is a sordid past where the 1up ceo stole the company from the engineer and startup inventor of the quick rack. I cannot support a dbag like that.

 
  • Love
Reactions: Watts_Up
So tempted to get this rack. Torn between this and the 1 up super duty. Price diff is $1879 vs $1040.

Do you need a 3 bikes rack?

The tool less appeals to me a lot cause I can easily take it on and off each time.

I have the 2 bikes rack QuikR (holder and add-on) it is very to remove and fold the two elements to keep them in the trunk when not in use.

Unless you want to keep the bike rack permanently installed, I think to have a single holder and separate add-on
is more easy to install and remove than a dual holder, and less cumberome when you need to carry only one bike.
 
Last edited:
Do you need a 3 bikes rack?


I have the 2 bikes rack QuikR (holder and add-on) it is very to remove and fold the two elements to keep them in the trunk when not in use.

Unless you want to keep the bike rack permanently installed, I think to have a single holder and separate add-on
is more easy to install and remove than a dual holder, and less cumberome when you need to carry only one bike.


I think both the super duty and the quick rack 2 come in single bike flavors with optional add on racks. The single super duty can have a max of 2 add ons for a total of 3 bikes. But the quick rack can accommodate max 3 add ons for a total of 4.

I love the ease of the quick rack 2 becoming a single since that is my most common usage.

It’s just so expensive and the wait is about 1.5 months now.

Any complaints about yours? Like any wobble left/right or front/back over speed bumps etc?
 
It’s just so expensive and the wait is about 1.5 months now.

Any complaints about yours? Like any wobble left/right or front/back over speed bumps etc?

I had to wait six months before delivery. Cost was $649 + $449.

The 2" receiver has an expending locking mechanism keeping the carrier very tigh.

Mountain bikes stay very sturdy. The carrier should handle E-Bikes with no problem, but I didn't try.
For road bikes with small tires the front wheel can oscillates a little bit inside the larger rail but not critical.

In fact, in general I remove the front wheel of my road bikes otherwise the whole bike is larger than my car,
something I am not comfortable with when I have to backup like when going to a Supercharger or parking inside a garage.
I use then a quick release fork mount that I strap above the rail to hold the bottom of the fork of the road bike.
 
  • Like
Reactions: Manbutter
I had to wait six months before delivery. Cost was $649 + $449.

The 2" receiver has an expending locking mechanism keeping the carrier very tigh.

Mountain bikes stay very sturdy. The carrier should handle E-Bikes with no problem, but I didn't try.
For road bikes with small tires the front wheel can oscillates a little bit inside the larger rail but not critical.

In fact, in general I remove the front wheel of my road bikes otherwise the whole bike is larger than my car,
something I am not comfortable with when I have to backup like when going to a Supercharger or parking inside a garage.
I use then a quick release fork mount that I strap above the rail to hold the bottom of the fork of the road bike.
That is a great idea. Thanks, I’ll have to do that for longer trips. You’re right, having a bike wider than the width of my car is not comfortable for me either; I don’t want to end up snagging a pedestrian especially when turning.
 
Thank you for the detailled pictures.
Maybe tapping the wires and installing a separate 4-wires plug attached to the 7-wires plug would be a possibility.

View attachment 861831 View attachment 861829 View attachment 861830

I noticed that the chain location might then interfer, so the 7-wites plug would need to be rotated to find the best location of a 4-wires plug.

View attachment 861832 View attachment 861833

Otherwise just hanging the 4-wires harness on the side using a magnet could be simpler.
Hi @Watts_Up - I'm curious if you ever figured out a solution for setting up trailer lights on the bike rack.

For those who are researching racks, I just received my Quikrstuff rack and took it on its first ride yesterday and have no regrets!

A few tips for new owners - adjust the captive pin post to the right-side, then shorten it to the shortest length by turning the knob and pushing the other end. I found that the closer it is, the easier it is to reach and release with your fingers.

Slide the rack forward so you can see 1-2mm of the rear tightening pad, then tighten. In this position, the captive pin post is behind the receiver flange (as a safety redundancy) and the rack can sit in the vertical position with about 1-2mm clearance from the bumper. You're also able to open the trunk hatch if with just 1 rack in the vertical position.

To remove, untighten and then push the rack in by 0.5 cm, it's a tight uncomfortable squeeze, but I'm able to reach my fingers through the gap and pull the captive pin post and pull the rack out of the receiver at the same time.
 
  • Like
Reactions: Watts_Up
For those who are researching racks, I just received my Quikrstuff rack and took it on its first ride yesterday and have no regrets!

Congrat !!! I like it also a lot.

It is very easy to secure bikes using the clamps holding very tight the wheels.
And it is easy to fold the bike carrier holders it and to store them into the trunk.

A few tips for new owners - adjust the captive pin post to the right-side, then shorten it to the shortest length by turning the knob and pushing the other end. I found that the closer it is, the easier it is to reach and release with your fingers.

Slide the rack forward so you can see 1-2mm of the rear tightening pad, then tighten. In this position, the captive pin post is behind the receiver flange (as a safety redundancy) and the rack can sit in the vertical position with about 1-2mm clearance from the bumper. You're also able to open the trunk hatch if with just 1 rack in the vertical position.

To remove, untighten and then push the rack in by 0.5 cm, it's a tight uncomfortable squeeze, but I'm able to reach my fingers through the gap and pull the captive pin post and pull the rack out of the receiver at the same time.

I am not sure to follow exactly what you are explaining. Could you provide a picture to help understanding your comment.
In my case, I removed the small safety pin:

hitch_side-view-1024x684.jpg


And I used instead a lock to provide additional holding safety and protection from getting the bike carrier to be stollen:

20230419_131105.jpg
 
Last edited:
Hi @Watts_Up - I'm curious if you ever figured out a solution for setting up trailer lights on the bike rack.

Yes, I added a set of LED lights on each carrier holder:

curt-53201-led-light-strips-for-hitch-jpg.857926


I used some magnets on the back of the LED bars, to easily change the orientation of the LED lights depending:

- if the bike carrier is vertical and empty,

20230726_190535.jpg


- or horizontal and carring bikes:

20230726_190511.jpg


20230726_190302.jpg
 
Last edited:
Initialy, I was passing the wires outside the carrier's rails, but the wires got pinced and damaged,
so I am now passing the wires inside the rails, see the following pictures:

20230726_190408.jpg


Detail showing how the main wire coming from the car gets spliited between the left and rigt sides:

20230726_190627.jpg


Additional plug added to the main bike carrier to provide power to the second bike carrier:

20230726_190740.jpg


And with the second plug connected:

20230726_190657.jpg
 
The bikes are quite far away fom the back of the car:

20230421_113355.jpg


20230421_113402.jpg


Note: I have a Model 3 StealthHitches but the 2" receiver was too low to the ground,
and I was hitting my driveway, so I raised it using the trailer carrier ball and welded a 2" receiver on top of it:

20230326_094217.jpg

20230326_085305.jpg


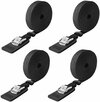
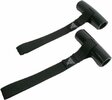
I noticed that the bikes were shaking a little bit when passing above a bump, so when I had to drive on freeway at higher speed,
I felt more secured to keep everything more tight by adding some straps and quick loops on each side of the car:

61P1CgWQ+2L._AC_SL1000_.jpg 51MskKnzVFL._AC_SL1200_.jpg


Strapes to tight the bikes - Right.jpg


Strapes to tight the bikes - Left .jpg
 
Last edited: