Welcome to Tesla Motors Club
Discuss Tesla's Model S, Model 3, Model X, Model Y, Cybertruck, Roadster and More.
Register
This site may earn commission on affiliate links.
I was thinking about this over coffee. Anybody who is considering spending $400 for the Macsboost kit could DIY this for next to nothing. I need somebody to confirm the relationship between the spacer thickness and the camber, but I don't have a refresh X. If anybody is in the Bay area I'd be down to shim and measure the camber and toe values so we can share the data freely.

Some notes:
- Another member has already confirmed the $400 shims are off the shelf 2.9mm (approx 1/8").
- Factory hardware appears to be M12

a98aeaa6d8c4732c843503177200dedb.png


To do this at home you will need four M12 (metric, so the nominal diameter is 12mm) washers, approx thickness of 3mm; 1/8" is a close standard equivalent. A correctly sized washer will work in pinch.

If we can measure the factory arm's flange, I can draw a simple square part that others can customize for their desired thickness, if they want to hit a target alignment. There are plenty of shops that will mill these for you

426054ebfc7a1e7465d46e9e5d0e1d03.png


IMG_4916-markup.jpeg


Quick mock up with a non-standard thickness that I priced through Xometry. I quoted laser cut 6061 below but other materials are available for an additional cost. Grade 5 Titanium will double the price...to a whopping $11.

If you are happy with the alignment from the 1/8" thickness there is no reason to have a spacer machined.

f63a8fcbb82e764162d37c7bed5db0a0.png


f90aeef6d43beda7719d95e2e51b17d8.png


59e9d5441f7009b65fc60ea2def20a78.png


Of course, the cost goes way down with volume and we can do cool things like anodize or powdercoat. There are also other manufacturing options available with volume.

If none of these options speak to you grab some 1/8" stock, a hacksaw, and a drill!
 
here’s an install write up from thadeus on FB, copied with permission:

EVPE Camber Shim Kit install instructions

This is a DIY overview. If you don’t know how to work on cars, please ask a shop to do the install. With the right tools and some mechanical knowledge, this is a one to three hour job in your garage on jack stands. An alignment shop should realistically only charge you one or two hours labor if you go that route.

Use all possible safety precautions if you are doing the install yourself. We take no responsibility if you damage your car or yourself during the install.

STEPS
1. Place the vehicle into minimum height necessary to get a jack underneath

2. Place the vehicle into JACK MODE

3. Raise one rear wheel off the ground with a jack using Tesla approved jack points - a jack puck helps prevent damage to the vehicle

4. Support the weight of the vehicle with something in addition to the jack (jacks fail from time to time)

5. Remove the wheel

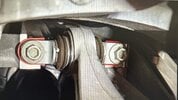
6. Take note of the upper aft link (1 finger) upper fore link (2 fingers) and the toe link (3 fingers) in the first photo - the shims will be installed between the aft link and the frame

7. Loosen but DO NOT completely remove the frame side bolts for these three links (if you remove the bolts, the ears for the frame side of each link will rotate, and it will be a PITA to line them up again

8. Slide one camber shim between each of the ears of the aft link and the frame (2 per side of vehicle). The flat side of the shims go toward the frame. The protrusions on the perimeter of the shims are meant to hold them against the ears of link and keep the shims from rotating

9. Tighten each of the 6 previously loosened bolts to 63 ft lbs - it may be helpful to use a jack to compress the suspension while tightening

10. Double check that the 6 bolts are tightened to spec

11. Mount wheel

12. Lower vehicle

13. Repeat on other side

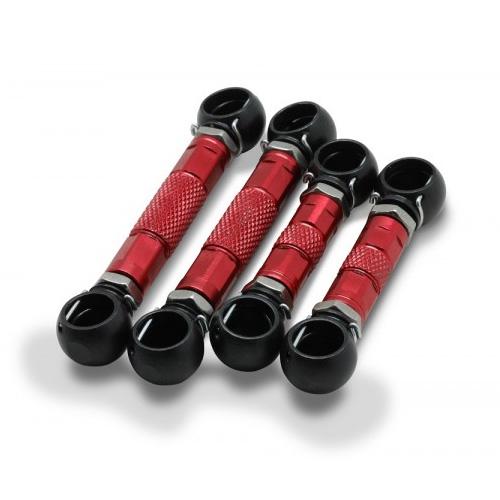
If you purchased the RED links - after step 9, keep the suspension compressed with the jack and remove/replace one factory bolt to aftermarket bolt at a time. This should keep the ears of the link from rotating. Alternatively, remove only the two bolts from the aft link during step 7 and replace them with the aftermarket bolts while the factory bolts for the fire link and toe link are loose to allow from movement and adjustment in the aft link.

IMG_6536.jpeg


IMG_6537.jpeg


IMG_6538.jpeg


Hope this helps, looks like you can loosen but not remove if you have the non-red version.
 

Attachments

  • IMG_6539.jpeg
    IMG_6539.jpeg
    246.3 KB · Views: 59
I can’t edit but someone mentioned the toe arms do not need to be loosened to do this, so just be away

You don't need to loosen your toe arms to install shims but you do need to set your toe afterwards. Lots of people have an approximation guessing with some a certain number of turns but it is no substitute for an alignment.
 
•Silver street setup
$60 shipped intro price
Designed with factory height and mildly lowered cars in mind
Provide a .7 degree reduction in camber
Utilize factory bolts

•Red race errr….lowered AF setup
$85 shipped intro price
For slammed cars or anyone who hates camber
Provide a 1.5 degree reduction in camber
Utilize longer bolts which are included
My S wore tires like crazy, my X doesn't even 100 miles on it but I want to get these asap. If I plan to drive low and very low the red ones make more sense right?
 
My S wore tires like crazy, my X doesn't even 100 miles on it but I want to get these asap. If I plan to drive low and very low the red ones make more sense right?

Depends on how low you want to run most of the time. Sounds like highway is always low, and I have a short 7 mile round trip commute, so for me, the most miles will be at low position.

I bought red, but tried to change my order to 2 sets of silver, but red had already shipped. I was told you can't stack 2 silvers, so my plan "B" wouldn't have worked. My thought was that I could have more flexibility when installing them.

Some mods I'm considering:
  • I live in ND so have deep snow to contend with at times, yet I'm considering the UPP lowering link kit to minimize front shaft wear. I doubt I need the fully adjustable camber kits some are buying.
  • UPP rear anti-sway bar, because, why not?
  • Already have the red shims, but hoping to have Tesla do an alignment read-only ($70) before taking delivery. I want to know where my rear camber is before installing the shims and then paying for 4 wheel alignment locally. (I live 200 miles from nearest SC.) I also hoping, if it's really off, maybe they'll fix it.
 
Last edited:
  • Like
Reactions: NJturtlePower
I ordered the Blox Link Lowering kit from Evannex last night. $160 (on sale) vs $495 for the UPP one and should be easier to install and allow more adjustment. With the "lowest" height setting lower, my red camber set purchase looks more attractive.

Buying too many parts before delivery and installing them outside the return window, makes me nervous. I bought my 10 pc floor mats during a Black Friday sale. That reminds me, I probably should order some Tesla logo puddle lights.

 
I'm curious if anyone has installed these Red or Silver shims and what is their thickness (for context) and what camber angle results from using them in a) lower setting or b) high setting?

If you're on Facebook, you may want to join the Tesla Model X Plaid group. Thadeus Strong is a mod for that group and he's the one selling the shims. I can get you the thickness of the red ones tonight, but I haven't taken delivery yet.
 
  • Like
Reactions: kbmoon
These solutions are pretty cheap and easy to install. I ordered a RED set and the MACSBOOST set b4 Xmas. I have yet to get into it with everything going on around the holidays. The additional thickness of the RED set sold me along with the longer bolts provided.

If you have questions, go back to the source and get factual answers. If it doesn't come from the source it's opinion and I don't work off of opinion.