


Welcome to Tesla Motors Club
Discuss Tesla's Model S, Model 3, Model X, Model Y, Cybertruck, Roadster and More.
Register
Install the app
How to install the app on iOS
You can install our site as a web app on your iOS device by utilizing the Add to Home Screen feature in Safari. Please see this thread for more details on this.
Note: This feature may not be available in some browsers.
-
Want to remove ads? Register an account and login to see fewer ads, and become a Supporting Member to remove almost all ads.
You are using an out of date browser. It may not display this or other websites correctly.
You should upgrade or use an alternative browser.
You should upgrade or use an alternative browser.
Model Y Subwoofer Bass Mod
- Thread starter teaston
- Start date

52 16 57 39
BioDiesel & Electrons
Raju Rahman
Member
Thanks for spending the time doing all this and explaining the process. I'm not really that technical when it comes to doing things like this myself and have always had it done at a car audio store. Problem is, they probably won't do the mod you've described and they'll want me to buy a sub and amp from them. Do you think fitting a nornal amp and sub (most likely kicker solo basic or Alpine Type R) will be safe? It'll probably give more bass and need to draw more power. Was even thinking about an active subwoofer with amp built in, like something from Audison, but I'm just worried if they'll be able to wire it all up properly and hopefully not lose too much range.My bass mod is now complete, I installed sound deadening in the arch around the sub and a bit on the sub box, but there were still a lot of vibration rattles coming from the boot lid panels, so I put a load on the boot lid and the plastic panels, now there’s no rattles on any frequency!
I now have loads of decent quality bass, really happy with the sound system now. Incredible VFM too, it’s cost me less than £300 total including the wiring kit, sound deadening and cable crimps. View attachment 799432View attachment 799433View attachment 799434View attachment 799435View attachment 799436View attachment 799437

Redman122905
Member
Pretty sure the type R 10/12 is around 750 rms and I have 2 L7 10 kickers that are 1000 rms with no issues. No rattles no squeaks and no warning lights. You’ll be fine as long as you get a reputable shop they should know what they’re doing if you go that route.
Raju Rahman
Member
That's the thing, Teslas are pretty new for most of these in car entertainment places. I've used one in particular for all my ice cars for about 11 years now but not sure if I can trust them to not mess the Tesla up.Pretty sure the type R 10/12 is around 750 rms and I have 2 L7 10 kickers that are 1000 rms with no issues. No rattles no squeaks and no warning lights. You’ll be fine as long as you get a reputable shop they should know what they’re doing if you go that route.
DadRS99
Member
I know nothing on how to install something like this. Is there any kind of guide you could put together?? Thanks!I finally got round to fitting the amp today, and I now have bass in my MY!!
I’ve only turned the amp’s gain control to halfway, and the bass control is turned all the way down, but the bass is immense! If anyone is considering a more powerful subwoofer or amp, I can guarantee you there is no need! In fact, I think the limiting factor of the stock system is definitely the amplification, so just installing this amp with the stock sub would probably work very well, with the gain control kept low to prevent damage to the sub of course.
The only issue is there is some rattling from the interior trim on some tracks on certain bass notes, so I will have to track them down and apply some felt or sound deadening.
I’m also very happy to find that the car’s subwoofer slider still works (well, it actually didn’t seem to do anything at all before!). And the install is totally non-destructive, so the car can easily be put back to standard. Also the amp takes up very little space in the front under boot floor area, still loads of space for all the charging leads, and air space to keep the amp cool (not that it needs much being a Class D amp, and only being run at 250w at 2ohms, and the gain control at halfway).
Sorry I didn’t take photos along the process of the installation, it was hard enough finding the couple of hours to do the install, but if anyone has any questions, please don’t hesitate to ask!View attachment 796788View attachment 796789
Detect
Member
I just completed the bass mod thanks to @teaston's work above. Used the same Vibe Powerbox amp, Skar wiring kit, Posi-taps, Metra adapter bracket for Tesla subwoofer, and some sound deadening material. Replaced the stock woofer with 8" Skar dual 4 ohm RMS 350W in the original woofer enclosure. Parallel wiring with 2 ohm final load at amp (RMS @2 ohm is 250W). Bass definitely hits a lot harder now for a less than $300 upgrade. Thanks for the helpful thread!
DadRS99
Member
As I know nothing about tools or construction, can you share how you cut a perfect circular hole there and what size? Trying to follow your lead!Facing downwards, here:View attachment 793344
DadRS99
Member
Is this the US version from Amazon?One issue I‘ve had with my Model Y compared to my old Model 3 is that there’s hardly any bass at all from the audio system, it wasn’t amazing in the M3, but it was noticeably better than the MY. If I turn the bass and sub sliders all the way up then there is some bass, but it’s very muddy sounding, and still virtually no punchy bass on bass drum sounds from rock music etc. I’m not wanting massive earth shattering bass, I’m far too old for that now, but I would like to feel my music.
I realised that whereas the M3 had some vent holes in the boot side panel where the subwoofer is housed, the MY has none, the panel is completely sealed, and the carpet sections are much more rigid than the flimsy M3 ones; which reminded of the time I fitted my 12” sub box in the boot of my E46 3 Series and got virtually no bass untill I removed a section of the metal bulkhead between the boot and passenger compartment!
I have now cut a hole in the side panel, on the horizontal section, so you will never see it, unless you stick your head underneath, and my initial findings are that it makes a big difference to the bass! Below are photos of where I have cut the hole (I will neaten up the edges with a file).
View attachment 792703View attachment 792704
Now I could leave it there, but after some research it appears that this 8” Kicker dual voice coil subwoofer should fit in the factory sub enclosure as a direct replacement for the existing sub, and should run off the Tesla amplifier, the Kicker sub needs minimum 150 watts, and the original sub inputs are 2x 80 watts (dual voice coil sub), giving at least 160 watts total. It is likely that the Tesla amp output is a single 80 watt 4 ohm output which is internally connected in parallel, meaning the stock subs two 4 ohm inputs become 2 ohm total, which doubles the amp output to 160 watts. The sub is only £109, so I’ve ordered one to see if it makes a decent improvement.
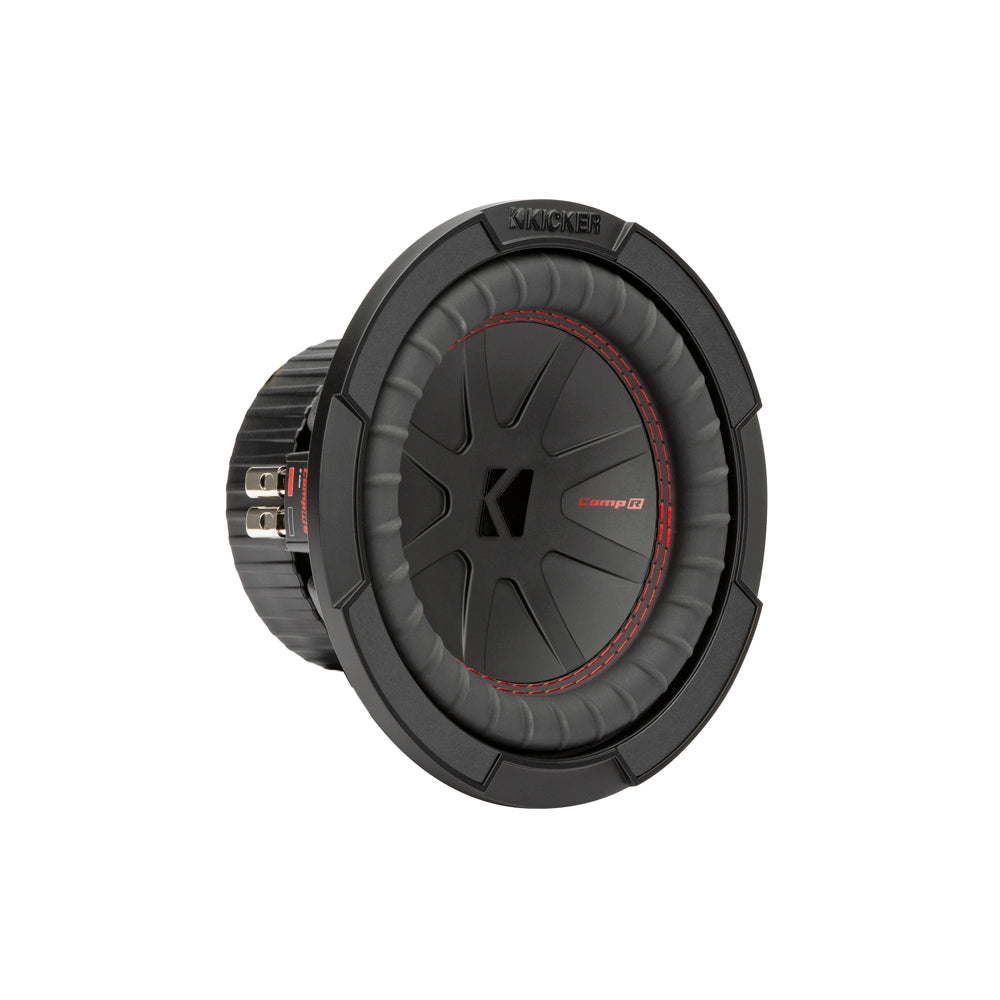
CompR 8" Dual Voice Coil Subwoofer - 4 Ohm
The KICKER 8" CompR subwoofer is the very model of power and reliability. Play them loud. Play them hard. Play them all day. They love it as much as you do.kickeruk.com
Here is somebody else’s photo of a similar Kicker sub (a single voice coil one, to be used with an aftermarket amp) fitted into the factory sub enclosure.
View attachment 792709
Also, to get even more bass then it will be fairly easy to add an amplifier to the sub, would need to run a positive cable from the terminal under the rear seat bench, but the rest of the required cables etc. are all behind that boot panel.
I will keep this project updated, if anyone is interested.
KICKER CompR 8"(20cm) Subwoofer, DVC, 4-ohm, RoHS Compliant https://a.co/d/cHV2HPN
Yes that looks like the one.Is this the US version from Amazon?
KICKER CompR 8"(20cm) Subwoofer, DVC, 4-ohm, RoHS Compliant https://a.co/d/cHV2HPN
I used this type of hole saw kit:
https://a.co/d/fPwc8iP
Whiskeypapa
Member
Maybe I found a clue why the newer models don’t have the vent on the panel. I put a 3-axis accelerometer on the panel, starting on the underside where @teaston cut the hole. With a 30 Hz sine wave playing through the sub, that part of the panel has little z-axis (up and down) movement. It actually vibrates more in the x-axis (left-right). Measured vibration on the large panel surface facing the cargo area, and saw lots of x-axis movement. What’s happening is the whole panel couples the acoustic energy for the subwoofer and passes it into the cargo area. The Tesla engineers probably figured out that at the low frequencies output by the subwoofer the panel doesn’t attenuate them significantly, and the hole didn’t change it much.Thanks. And I wonder if I cut it out and don’t like the sound I could probably tape or fasten back somehow? Maybe??
If you start adding deadening material on that panel or change the sub and/or amp to increase the SPL, that could make the presence of a vent/hole much more significant, because the panel wouldn’t be passing the sub’s output to the cabin. Once I finally get started on my sub upgrade, I’ll repeat the measurements and see if it looks like the panel is attenuating and if a hole would provide more boom.
Wow, i like your commitment to this project! Those are interesting findings, keep us updated with any further info.Maybe I found a clue why the newer models don’t have the vent on the panel. I put a 3-axis accelerometer on the panel, starting on the underside where @teaston cut the hole. With a 30 Hz sine wave playing through the sub, that part of the panel has little z-axis (up and down) movement. It actually vibrates more in the x-axis (left-right). Measured vibration on the large panel surface facing the cargo area, and saw lots of x-axis movement. What’s happening is the whole panel couples the acoustic energy for the subwoofer and passes it into the cargo area. The Tesla engineers probably figured out that at the low frequencies output by the subwoofer the panel doesn’t attenuate them significantly, and the hole didn’t change it much.
If you start adding deadening material on that panel or change the sub and/or amp to increase the SPL, that could make the presence of a vent/hole much more significant, because the panel wouldn’t be passing the sub’s output to the cabin. Once I finally get started on my sub upgrade, I’ll repeat the measurements and see if it looks like the panel is attenuating and if a hole would provide more boom.
tribhuvanji
Member
@Whiskeypapa Nothing beats measurements like subjectivity. I concur 100% - with the stock system (except I already have a ton of sound deadening installed back there and applied to the sub housing) I tore out the side panel and put it back again, listening carefully to both. Yeap, the stock bass sounds the same with the panel and without.
Agreed a jacked up speaker and amp may be a different story re. top venting. Not surprisingly the panel at the x axis (to the left, directly in front of the speaker) is nowhere near dense enough nor thick enough to come close to a quarter wavelength and will not have an effect on the low freq sounds emanating from the sub.
@teaston @Detect Thanks guys for all the details, looking into this amp/speaker mod!
edit: sound deadening is installed behind and below the sub on all the metal and none on the plastic storage panels
Last edited:
Edsonbarron
Member
I hate being that guy, but if you have links to the wiring kit and positaps you used that would be awesome. I went ahead and ordered the power box!I just completed the bass mod thanks to @teaston's work above. Used the same Vibe Powerbox amp, Skar wiring kit, Posi-taps, Metra adapter bracket for Tesla subwoofer, and some sound deadening material. Replaced the stock woofer with 8" Skar dual 4 ohm RMS 350W in the original woofer enclosure. Parallel wiring with 2 ohm final load at amp (RMS @2 ohm is 250W). Bass definitely hits a lot harder now for a less than $300 upgrade. Thanks for the helpful thread!
Detect
Member
Skar wiring kit 8 ga OFC https://www.amazon.com/gp/product/B07TBCLN4HI hate being that guy, but if you have links to the wiring kit and positaps you used that would be awesome. I went ahead and ordered the power box!
Positap 18 ga mini https://www.amazon.com/gp/product/B0B381V1Q6
Metra adapter had some fitment issues so I'm planning to replace it with this Amped Garage one:

Amped Garage Tesla Model 3/Y OEM Trunk Subwoofer Conversion mounting bracket | eBay
1/8 foam tape (Applied between enclosure and Amped Garage Bracket). Speaker and speaker harness not included. Speaker, Enclosure and harness in picture is for reference only. Use #8 Pan head at whatever length that will work.
www.ebay.com
Amped Garage also has a subwoofer wiring harness, which isn't required with an aftermarket amp, but nice to have for those looking for a plug and play solution to upgrade the sub while still using the stock amp or could replace to need for positaps if you add speaker wire to RCA adapters. Tesla Model 3/Y OEM Trunk Subwoofer harness | eBay
Edsonbarron
Member
Alright so I ordered everything, even the deadening material. Install planned for this weekend!Skar wiring kit 8 ga OFC https://www.amazon.com/gp/product/B07TBCLN4H
Positap 18 ga mini https://www.amazon.com/gp/product/B0B381V1Q6
Metra adapter had some fitment issues so I'm planning to replace it with this Amped Garage one:
Amped Garage Tesla Model 3/Y OEM Trunk Subwoofer Conversion mounting bracket | eBay
1/8 foam tape (Applied between enclosure and Amped Garage Bracket). Speaker and speaker harness not included. Speaker, Enclosure and harness in picture is for reference only. Use #8 Pan head at whatever length that will work.www.ebay.com
Amped Garage also has a subwoofer wiring harness, which isn't required with an aftermarket amp, but nice to have for those looking for a plug and play solution to upgrade the sub while still using the stock amp or could replace to need for positaps if you add speaker wire to RCA adapters. Tesla Model 3/Y OEM Trunk Subwoofer harness | eBay
Edsonbarron
Member
@Detect quick question, first what do you have your amp settings at? Can’t seem to find something I like yet settings wise. Second just wanted to make sure I was doing something right, on the hi level plugs the red plug positaps to the red and green wires coming off the amp, and the black plug goes to the black and blue wires right?
Detect
Member
gain and crossover about 1/3 way. zero bass boost. about 0 for subwoofer on head unit eq. for the wires, i don't remember which colors, but you can follow them to the stock woofer. you can also look up NVX install on youtube, should be the same colors as that. make sure negative and positive are right or else it won't sound right.@Detect quick question, first what do you have your amp settings at? Can’t seem to find something I like yet settings wise. Second just wanted to make sure I was doing something right, on the hi level plugs the red plug positaps to the red and green wires coming off the amp, and the black plug goes to the black and blue wires right?
Similar threads
- Replies
- 3
- Views
- 1K
- Replies
- 30
- Views
- 3K
- Replies
- 18
- Views
- 3K
- Replies
- 15
- Views
- 4K