Welcome to Tesla Motors Club
Discuss Tesla's Model S, Model 3, Model X, Model Y, Cybertruck, Roadster and More.
Register

My DIY Rear Facing Jump Seats Retrofit (with Service Bulletin / Official Instructions)

This site may earn commission on affiliate links.
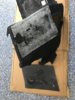
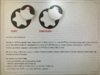
... Found the factory wiring taped out of the way for the left and right rear interior lights - I had bought a whole set of AO LED interior lights, so two of those will go to improving the trunk lighting.

David.85D, since you are looking at adding the AO interior lights, I thought you might like to see this Ao light project I did on my car.
https://teslatap.com/modifications/lights-how-to-improve-trunk-lighting-2/ Sure makes a difference to the available lights in the trunk.
 
A couple more photos showing the pre-notched cut outs for the rear seat install and the pre-notched cut out for the trunk lights. They are really making it easy for me! Also, a photo showing the soundproofing mat that fell off (both L and R sides looked like this). I used strong 3M spray adhesive to re-attach it, and some tape to hold it in place while that glue sets.
 

Attachments

  • IMG_9718.JPG
    IMG_9718.JPG
    931.3 KB · Views: 371
  • IMG_9719.JPG
    IMG_9719.JPG
    465.6 KB · Views: 329
  • IMG_9720.JPG
    IMG_9720.JPG
    793.8 KB · Views: 353
  • Like
Reactions: MP3Mike
Ran into problems this evening trying to remove the bolts with T45 torx... It as though they are glued in there or welded, and I stopped short because I am worried I'm going to strip the bolt. Does anyone have any tricks for getting a good angle on the bolt? Or should I just take it in and have tesla do it? I will say that the T45 doesn't seem to be the exact right fit, and this wiggle room is the thing that makes me nervous to really turn it hard.
 
An update. Got a partial answer for the what is "1st generation rear node" vs. "2nd generation rear node" question and what I discovered is clear for me, but not completely clear for everyone. The service instructions apparently have some notes that say "2nd generation rear node" is cars "manufactured after November 2, 2014" in one place and "post Sept 1, 2014" in another place. So good luck figuring it out if you have a car made in Sept or Oct of 2014... Mine is later, so I think I am safely in the "2nd generation rear node" camp.

About those bolts - I haven't gotten my new ones in yet, so I can't check. I have searched everything I can find and don't see reference to them. I will post as soon as I get my hands on them. What sort of tool are you using? I prefer a torx sockets to use with a ratchet, but sometimes you need a short arm "L" key.
 
Yes, I was trying with a ratchet tool... and I quickly see why that is not a good idea... I think I'll try to do it the right way next time. T45 is definitely close to the right size... I'll email service as well.
 
Got the new bolts from the service center today. The two black oxide bolts (attach the main hinge near the footwell) seem to me to need a T45 wrench. The four silver colored bolts that hold the striker plates in place appear to use a T40 wrench. All of these bolts have pre-applied blue thread locker (Loctite calls their version DRI STS - adds a tiny amount of drag during application, then 30+ ft-lbs of extra torque needed to break them loose after 3 days cure) which is probably why you feel they are hard to get moving.
 
  • Like
Reactions: Akikiki
Got the new bolts from the service center today. The two black oxide bolts (attach the main hinge near the footwell) seem to me to need a T45 wrench. The four silver colored bolts that hold the striker plates in place appear to use a T40 wrench. All of these bolts have pre-applied blue thread locker (Loctite calls their version DRI STS - adds a tiny amount of drag during application, then 30+ ft-lbs of extra torque needed to break them loose after 3 days cure) which is probably why you feel they are hard to get moving.
Ah... got it, I will get a longer and more steady L type wrench to the torque to break it loose. Thanks!
 
Like a glove!!! The two black-oxide bolts (the rear most hinge, near the footwell) seem to me to be torx-plus-45 and not regular Torx.

The silver ones (the left and right strikers) seem to be regular torx-40. My torx-plus-40 bit wouldn't fit at all.

What a PITA! Here's some photos if you want to stare at the ink-blot's yourself. These are brand new bolts just collected from the service center. Guess there is no guarantee they haven't changed over time.
 

Attachments

  • IMG_9764.JPG
    IMG_9764.JPG
    925.5 KB · Views: 331
  • IMG_9765.JPG
    IMG_9765.JPG
    233.7 KB · Views: 328
  • IMG_9766.JPG
    IMG_9766.JPG
    274.7 KB · Views: 326
  • Informative
Reactions: buttershrimp
Thanks will go get the plus size
Like a glove!!! The two black-oxide bolts (the rear most hinge, near the footwell) seem to me to be torx-plus-45 and not regular Torx.

The silver ones (the left and right strikers) seem to be regular torx-40. My torx-plus-40 bit wouldn't fit at all.

What a PITA! Here's some photos if you want to stare at the ink-blot's yourself. These are brand new bolts just collected from the service center. Guess there is no guarantee they haven't changed over time.
Th
 
I just received the bit and bought a small soldering iron to try and heat up the red loctite, and I talked to the service center... they apparently heat up the bolts to remove the bolts. My issue is that I'm realizing the black oxide coating makes it very difficult to heat the bolt with a small soldering iron. I've tried sanding the oxide layer away on a test bolt and it still is pretty slow to conduct heat. Certainly not hot enough... does anyone have any ideas on how to heat the bolt up without removing the carpet and torching the trunk? I don't know how to weld, so I have very little understanding of how the soldering iron heats things up... any tips?
 
They make all different size soldering irons. A typical 20 or 30 watt home electronic version won't do jack. Buy or borrow a 100 to 300 watt soldering iron meant for heavy wire.

Agree that a soldering iron is safer than an open torch. That carpet will be easy to melt if not burn outright.

But Really? A long handled wrench should do it. The bolt spec is 20 ft-lbs. if the loctite is adding 30 more, that's 50 ft-lbs total.

I have one of these for really stubborn bolts.
About $10 with the 20% off coupons floating around. You may also need a 1/2" to 3/8" adapter.

1/2 in. Drive 25 in. Breaker Bar
 
Well... that didn't work! My rear facing seats are definitely a permanent installation. To be fair, even heating them wouldn't have worked... the bolts were a little stripped from my first T45 (non-torx plus bit), but now at least one of the bolts is fully stripped. If I remove them, I'll have to cut them out.... so they are staying. I think there is a good chance they wouldn't have come out even with heating them and the right torx plus bit from the get go. They didn't budge at all. Anyone want to buy a 20 dollar soldering iron? FML
 
Sorry it went that way. Drilling it is not the end of the world. Just takes some time.

In the BMW world, the "Jesus bolt" is the main crank bolt that often exceeds 400 ft-lbs and breaks a lot of tools that aren't up to the job. I guess this will become the "Jesus bolt"...