LongRanger
Active Member
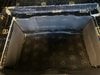
adhesive closed-cell foam sandwiched between the metal "parcel shelf" and black interior covering will help with road noise generated/exacerbated by the air held in the boot. If you can get 1/4" minimum in there, this could be a winner.
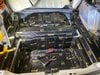
I'm going to have to take out the whole shelf covering and rear left c-pillar trim to sort out rattles so will document with pics when I get round to it.
Some place sell this in 2mx1m adhesive sheets, will be a perfect size for full covering and some bits left over for problem trims.
I'm going to have to take out the whole shelf covering and rear left c-pillar trim to sort out rattles so will document with pics when I get round to it.
Some place sell this in 2mx1m adhesive sheets, will be a perfect size for full covering and some bits left over for problem trims.