I just wanted to share with the community some advice after replacing my MCU1 emmc chip on a 2015 MS.
I knew my EMMC started to have issues, but was fooled by it not getting worse as long as I was not updating, and procrastinated for few months. Once I removed the emmc, it turned out the image was too corrupt to just do a simple transfer (luckily the car specific files survived intact). After 5 EMMC transplants later with some help from a kind samaritan with an image backup I could use to reconstruct the damaged parts of my emmc image, I now have an MCU1 faster than new and which will last 28 times as long as the original (7x P/E cycles * 4 times the size therefore available cells).
")
Slight overkill? Maybe, but having 140 projected years (28 times as long as mine lasted), means that the performance degradation of emmc in the next 14 years will be the same my car saw over the first 6 months of its life. So, pretty much for the conceivable remainder of this Model S life, its MCU should continue to be fast and responsive unless of course Tesla software engineers screw it up by adding code bloat (new fart modes) or moving to some new abstract web technologies which overwhelm the CPU or memory capabilities in exchange for being able to hire cheaper developers. Also, should I choose to drive more or in hotter or colder conditions, emmc will age faster. Oh, besides the MCU being noticeably more responsive, my browser seems to be working, first time in many, many, months (maybe over a year, since v9 IIRC), except now only full screen, so not as useful for Tesla Waze and GPS map at the same time
!
Some advice to share (things I did not see in some other howtos, or specific issues I happen to run into):
- Do not postpone your preventative EMMC replacement until it’s too late. I barely managed to recover car specific files due to my procrastination. I was slightly fooled by the fact that the MCU stopped getting worse when I started refusing updates and stopped streaming.
- With MCU out the DC-to-DC converter is not going to kick in to replenish the 12V battery, so a battery tender is a good idea if you are not disconnecting the 12V and HV batteries. HOWEVER, I found that if the car decides to run battery coolant pumps 24 hr a day, it will overwhelm even a 10 Amp battery tender and your 12V battery will be drained (happened to me twice in 7 days, as I was working on this only in the evening only, but with the COVID-19 it's not like I had anywhere to drive).
- Make sure you fsck check all your partitions, AND , and this is important (had I known this, it would have saved me A LOT of work) make sure you can unsquashfs partitions 1 and 2. If you cannot, no point soldering on a new EMMC chip, the MCU will not boot all the way.
- If you want best performance and longest life either reconfigure your new emmc to be 100% pSLC mode (cannot be done using the USB reader, only the SD one connected to an MMC controller - use "mmc enh_area set" command, WARNING, this is a one time operation, unreversible, so read up a little on how to use it), or buy it pre-configured from the factory as with the EM-26 series of Swissbit (which is just EM-20 series factory configured as pSLC). You get 7x the number or program-erase cycles, greater reliability, and faster I/O (read/write) performance over MLC mode – the only tradeoff is you pay twice the price for the chip since pSLC uses twice the cells for the same capacity (but given the effort to change it out, it was well worth the extra $35 to me). I got it to work with 32GB EM-26 part (64GB factory pre-configured as pSLC) and with a 32GB EM-20 part I manually reconfigured to 16GB pSLC (it was one my attempts with a bad image, but I confirmed the system booted and wrote correct syslog to that 16GB pSLC part).
- If you have the new chip connected to an MMC controller (vs. USB), pre-TRIM the entire device (blkdiscard Linux command) BEFORE you flash the image onto it to allow the emmc chip to use all unused space for wear leveling. Even if Tesla implementation issues TRIM commands, they are likely only for the filesystem and doesn’t trim unused areas outside of valid partitions. The chip might come pre-trimmed from the factory, but I saw nothing in the datasheets which guarantees it.
- Don’t forget to use ESD/grounding. ESD kills, just usually not instantly. In my career I’ve seem only a handful total/instant kills with accidental ESD, I have however seen many ESD damaged chips which kept on working, but damaged - e.g. they draw a lot more power and overheat due to damaged I/O buffers, or suffer from weird resets and data corruptions. While a lot of devices out there are ESD protected, chips are not always protected, so when you touch/work with bare boards and/or chips, use ESD precautions.
- Factory reset doesn’t clear out BT settings. After I finally rebuilt my image and successfully booted, even though I performed a factory reset twice, my phone re-connected to the MCU. Unfortunately, every time my phone connected, I lost all my audio from speakers (took me a few minutes to correlate the two, at first I just noticed audio when it first boots, then all audio gone). What solved it was manually unpairing the phone and re-pairing again.
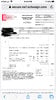
- Take good high res pictures of your board before and after. After I finally rebuilt the image, I booted it successfully, everything worked except for backup camera. After some more investigation, I realized that on my 5th and final rework I managed to lose a tiny 10 Ohm resistor, which must be for impedance matching on one of the camera data lines. Replacing that resistor brought the camera back. Without good pictures, I would have never been able to track it down, as this board has a ton of unpopulated components. Here is the missing resistor (in case this happens to you):View attachment 536737