Welcome to Tesla Motors Club
Discuss Tesla's Model S, Model 3, Model X, Model Y, Cybertruck, Roadster and More.
Register

MPP AWD/Performance Coilover Impression and Installation

This site may earn commission on affiliate links.
Tip for those who have yet to install their coilovers:

Follow what MPP posted earlier in this thread (quoted above). I exchanged emails with Jesse and he confirmed that we should only be using the parts shown, arranged in this sequence (from top to bottom):
  • OEM shock hat
  • composite spacer
  • main spring
  • perch adapter
  • perch
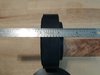
I purchased my kit in mid-2019, but the kit has evolved since then. The tender springs, rubber isolators (OEM, as well as any provided in the box), and the thin plastic and metal rings are no longer used. If your kit contains these items, disregard them. If your kit has the tender springs, reach out to MPP so they can ship you the composite spacer to use instead.

It seems like there will be more NVH without any type of isolator between the OEM top hat and the composite spacer not just with MPP coilovers but any coilovers per several accounts on this forum from regularly contributing members.

I'm a bit surprised to hear that is the recommendation per MPP.
 
It seems like there will be more NVH without any type of isolator between the OEM top hat and the composite spacer not just with MPP coilovers but any coilovers per several accounts on this forum from regularly contributing members.

I'm a bit surprised to hear that is the recommendation per MPP.

Same here. Particularly after the difference between the original (coming with the kit) rubber isolator and the OEM isolator was pretty dramatically revealed to me after my install. After I switched back to the OEM isolator, the difference was really discernible.
 
Perhaps this composite spacer is what KW uses that was previously spoken about...

#3 - KW's kits use a thinner spacer that does not use the OEM rubber. Again there is more NVH transmission with this method, but it is about 7-8mm thinner than our spacer, effectively allowing you to lower the car around 10mm from our spacer. Contact us and we can order these upon request. I know right now they are back-ordered.
 
Would it be possible for those of us with the aluminum spacer to order composite spacer?

If you are running the aluminum spacer with OEM isolator, I don't think it is necessary to change to the composite ones. They are more or less the same in NVH characteristics. The only reason you might find you want the composite spacer is if you are out of threads on the front damper and still want to go lower.
 
  • Like
Reactions: dfwatt
If you are running the aluminum spacer with OEM isolator, I don't think it is necessary to change to the composite ones. They are more or less the same in NVH characteristics. The only reason you might find you want the composite spacer is if you are out of threads on the front damper and still want to go lower.

Excellent! Speaking of your great suspension goodies. How close are you guys to shipping the trailing and traction arms? And how long does it take to install those?
 
UPS just dropped by....

The fully compressed tender spring is exactly 1" (25.4 mm), but was to be used with a rubber isolator and required the use of an aluminum adapter between the main spring and the tender spring which measures 4 mm. I don't know the width of the OEM rubber isolator. The MPP supplied rubber isolator is 6.4 mm. Total width 35.8 mm

The composite spacer is exactly 1" (25.4 mm), but there is a flat lip protruding from the top (no I'm not talking about the part that centers the spring) that measures about 2.4 mm, so total 27.8 mm. This is used without any rubber isolators. Total width 27.8 mm

The aluminum spacer is 33.4 mm (Sasha previous said the aluminum spacer is about 8 mm thicker. I don't know the width of the OEM rubber isolator. The MPP supplied rubber isolator is 6.4 mm. Total width 39.8 mm

So that's where all the threads went!
 

Attachments

  • 20200204_154236~2.jpg
    20200204_154236~2.jpg
    289.5 KB · Views: 92
Last edited:
If you are running the aluminum spacer with OEM isolator, I don't think it is necessary to change to the composite ones. They are more or less the same in NVH characteristics. The only reason you might find you want the composite spacer is if you are out of threads on the front damper and still want to go lower.

I was running with tender springs at the bottom most settings. Then changed to the aluminum spacer because of the inside of the main spring rubbing the top hat slightly and couldn’t get the car as low as before. Would be nice to reclaim the lower adjustment which out having to go back to the tender spring.

Any eta update on the lower control arm bushing replacement?
 
Excellent! Speaking of your great suspension goodies. How close are you guys to shipping the trailing and traction arms? And how long does it take to install those?

We are getting those by the end of this week, then we need to get them all packed up and sent out! One pair is very easy to replace, one is a bit difficult. We will have instructions to help you through, but you'll probably want a pry bar.
 
I was running with tender springs at the bottom most settings. Then changed to the aluminum spacer because of the inside of the main spring rubbing the top hat slightly and couldn’t get the car as low as before. Would be nice to reclaim the lower adjustment which out having to go back to the tender spring.

Any eta update on the lower control arm bushing replacement?

Please shoot us an email so I can make sure to order you a set of the composite spacers! The FLCA bushingss are finishing up and will be arriving here next week, the shipping date will depend on where you land on the order list.
 
We are getting those by the end of this week, then we need to get them all packed up and sent out! One pair is very easy to replace, one is a bit difficult. We will have instructions to help you through, but you'll probably want a pry bar.

I'm assuming by one pair is easy to replace you mean that one side of traction and trailing arms swapped out at the same time? That for sure would be my plan! Looking forward to getting them. I expect they'll tighten up the rear suspension quite a bit. But what about NVH?
 
I'm assuming by one pair is easy to replace you mean that one side of traction and trailing arms swapped out at the same time? That for sure would be my plan! Looking forward to getting them. I expect they'll tighten up the rear suspension quite a bit. But what about NVH?
We were worried it would have a negative impact, but the tone of cracks in the road actually changed and sounds more like a Porsche GT3 RS. It is impossible for me to describe the sound though, but we consider to be an improvement.
 
I put the composite spacers on, but against manufacturers recommendation, I used the MPP supplied rubber isolator. I really didn't want any chance of noise.

I was about the get away with using the rubber isolator and still achieve the amount of lowering that I wanted, 25 mm.

The lowest I could get the front was 40 mm with the composite spacer and MPP rubber isolator, but that's way too low for me.
 
  • Like
Reactions: dfwatt
I put the composite spacers on, but against manufacturers recommendation, I used the MPP supplied rubber isolator. I really didn't want any chance of noise.

I was about the get away with using the rubber isolator and still achieve the amount of lowering that I wanted, 25 mm.

The lowest I could get the front was 40 mm with the composite spacer and MPP rubber isolator, but that's way too low for me.

How rebellious of you! We hope you enjoy your kit :)
 
I'm loving it and regret putting it off so long. I'm currently running 10C 8R. Which to me results in about the same harshness as stock with much improved handling, so this will be my street setting. 12C 10R is very nice and comfortable with much improvement, but a bit too comfortable for me.

That's where I have mine set as well. It seems like a great compromise in terms of the street. Handling is dramatically better and although large bumps are pretty firm the car is not harsh.
 
Traction arm install. Note aftermarket and OEM bolt and 18 mm ratcheting box wrench. You will need this!

20200315_155547.jpg
20200315_160310.jpg
20200315_162845.jpg
20200315_162850.jpg


We are getting those by the end of this week, then we need to get them all packed up and sent out! One pair is very easy to replace, one is a bit difficult. We will have instructions to help you through, but you'll probably want a pry bar.

You would think that something this relatively accessible would be easy to take out and replace with MPPs beautiful blue traction arm!! Hah!! You'd be wrong! Yes a pry bar and a lot of curse words!

I did manage to get the traction arms out but it was a bear. I realize that a little bit of sharing of my experience may help a lot of people avoid a certain amount of grief although it's not the easiest job intrinsically. First things first. Get an 18 mm ratcheting box wrench of the kind pictured in the photo here. It will make both extraction of the OEM arm and the install of the new arm world's easier. There's really barely enough room and in some cases not enough room for even the smallest most compact socket. Why Tesla used an 18 mm nut there when 17 and 19 both would have been more standard sizes and plenty for the 60 foot pound torque it is beyond me.

In any case when you loosen the OEM nut from the inside or top portion of the traction arm you will have to deform the traction bushing itself to allow that very long bolt to come out. There's not enough room laterally to simply move it out because it bumps into the sheet metal before it's fully out of the channel. So you'll have to take the OEM traction arm and disconnect it from the lower wheel side and then grab that and twist it in order to get that long bolt to release. There is no way to get the bolt to come out that I can see without deforming the sheet metal otherwise.

Secondly - and the cause for some additional cursing and/or brief panic, you will quickly discover that now that you have taken the OEM traction arm out the distance between the mounting surfaces has altered by the wheel rotating slightly and I'm presuming this is simply coming from anti roll bar torque. You will need to apply about a hundred and fifty pounds of lifting Force to the bottom of the disc and brake assembly to get the rotation canceled out in order to get the surfaces all nicely lined up so that the new traction arm (which identically sized to the OEM) can actually be mounted. Otherwise there's too much distance and poor alignment. The picture shows what I did to improvise as I did not have a second person around to supply the approximately 150 lb of lifting Force necessary to normalize the mount distance. Second Jack makes this much easier.

But when you are done voila. Suspension bling! The blue is slowly taking over! Can't have too many blue bits in this suspension! Keep the blue coming!
 
Last edited: