


Welcome to Tesla Motors Club
Discuss Tesla's Model S, Model 3, Model X, Model Y, Cybertruck, Roadster and More.
Register
Install the app
How to install the app on iOS
You can install our site as a web app on your iOS device by utilizing the Add to Home Screen feature in Safari. Please see this thread for more details on this.
Note: This feature may not be available in some browsers.
-
Want to remove ads? Register an account and login to see fewer ads, and become a Supporting Member to remove almost all ads.
You are using an out of date browser. It may not display this or other websites correctly.
You should upgrade or use an alternative browser.
You should upgrade or use an alternative browser.
Ear pain/Pressure help
- Thread starter justobuf
- Start date
-
- Tags
- sound proofing
Quick update. We had this boomy-ness at low speeds for the first couple months, but now that we have some miles on the car it is completly gone. Not sure if the tires started wearing or the suspension had to break in, but wanted to follow-up and let folks know.
My Y was delivered yesterday. I could feel the ear pressure and the noise after a few seconds of driving. It doesn't go away at high speeds.Quick update. We had this boomy-ness at low speeds for the first couple months, but now that we have some miles on the car it is completly gone. Not sure if the tires started wearing or the suspension had to break in, but wanted to follow-up and let folks know.
ilovecoffee
Member
I installed a rear cargo privacy retractable shelf and it seems to have helped reduce low frequency boominess according to spectrum analysis on my phone by a few dB. It's still there of course but not as bad.
I think trying to separate the rear cargo area as much as possible will have the biggest effect.
I think trying to separate the rear cargo area as much as possible will have the biggest effect.
TSMR
New Member
Which shelf did you buy?I installed a rear cargo privacy retractable shelf and it seems to have helped reduce low frequency boominess according to spectrum analysis on my phone by a few dB. It's still there of course but not as bad.
I think trying to separate the rear cargo area as much as possible will have the biggest effect.
ilovecoffee
Member
The BASENOR one. Fwiw I also threw a flannel blanket on top of it.
BASENOR Tesla Model Y Retractable Cargo Cover Rear Trunk Shield Privacy Cover 2021 2020 (No Drilling Required) https://www.amazon.ca/dp/B093RVCWTC/ref=cm_sw_r_apan_glt_i_CNY28RSSFVNX4N4XX1RG?_encoding=UTF8&psc=1
BASENOR Tesla Model Y Retractable Cargo Cover Rear Trunk Shield Privacy Cover 2021 2020 (No Drilling Required) https://www.amazon.ca/dp/B093RVCWTC/ref=cm_sw_r_apan_glt_i_CNY28RSSFVNX4N4XX1RG?_encoding=UTF8&psc=1
coselectric
Member
Here's the link to the earlier post I made explaining the rear hatch stopper adjustment procedure. Seems like there have been a few recent posts from people experiencing pressure buffeting on their new Model Y's. Try this: Ear pain/Pressure help
ilovecoffee
Member
Coselectric, do you happen to have a caliper to share the measurements of each of the stoppers? I know it could vary depending on how the hatch is bolted on, but I'd like to compare it with mine. Still haven't quite nailed it down. It would be a big help to me.Here's the link to the earlier post I made explaining the rear hatch stopper adjustment procedure. Seems like there have been a few recent posts from people experiencing pressure buffeting on their new Model Y's. Try this: Ear pain/Pressure help
coselectric
Member
Coselectric, do you happen to have a caliper to share the measurements of each of the stoppers? I know it could vary depending on how the hatch is bolted on, but I'd like to compare it with mine. Still haven't quite nailed it down. It would be a big help to me.
I do not have a caliper, but I used a ruler just to get a ballpark. My lower stoppers as measured from the outside edge are at about 9-10 mm (the body is curved where they protrude) and the upper ones are at 22 mm.
ilovecoffee
Member
Great! Thanks so much! I will compare!I do not have a caliper, but I used a ruler just to get a ballpark. My lower stoppers as measured from the outside edge are at about 9-10 mm (the body is curved where they protrude) and the upper ones are at 22 mm.
ilovecoffee
Member
Not the prettiest solution to making the stoppers more rigid, but I used "Polymorph" which is like a fairly moldable plastic once you heat it in boiling water.
I simply put quite a lot of it on each of the stoppers in a cone shape, and then shut the hatch to make an impression. I did notice that it's much harder to make the hatch move slightly by hand now when closed.
The plastic doesn't bond to the surface BTW, so it's completely removable, and you can simply heat it up again to mold it again.
I was trying to think of other places in the hatch opening that Polymorph could make it more rigid.
I did notice an improvement btw. Still not perfect, but better.
Because that would cost money and require manufacturing expertise they do not currently posses.I do not understand why Tesla/Elon do not make necessary update/change/fix to this issue.
For those who aren't reading the whole thread, I posted a low cost, nice looking fix for this.
 teslamotorsclub.com
Easy and effective low frequency fix
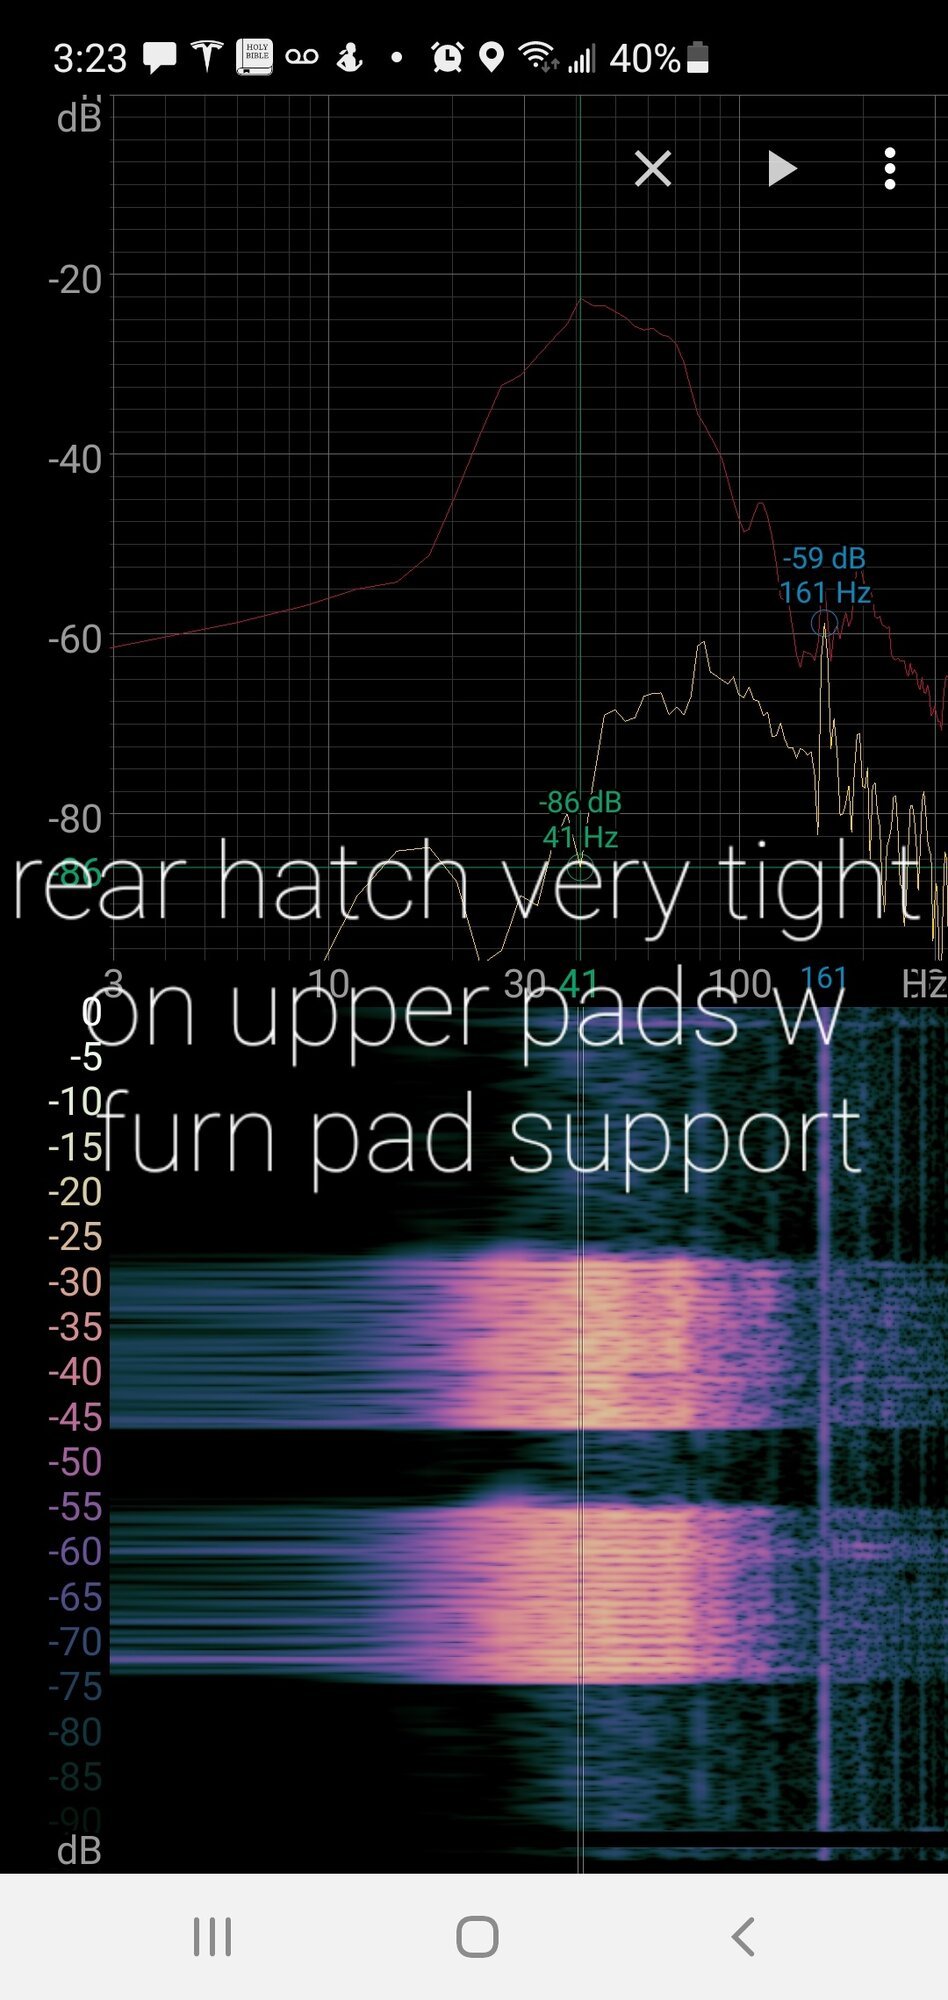
I have solved the low frequency issue with my car. I had a 41 Hz standing wave that would come and go. It wasn't good. If the hatch bumpers are loose, a crazy subsonic buffeting occurs. I'm talking about the annoying rumble that is still there when the bumpers are properly adjusted. To keep it...
teslamotorsclub.com
Perhaps because only a small percentage of people have been impacted by this issue....I do not understand why Tesla/Elon do not make necessary update/change/fix to this issue.
Mike_TV
Active Member
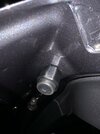
Thanks for attaching that picture.I tried to unscrew them with my hand. Doesn't look like it moved at all. I am able to unscrew the side stoppers with my hand, but not the rear ones. They look different.
That Tesla part (the hard plastic part) looks like...
1559817-00-A
Liftgate bump stop - plastic nut
Right?
MrWhiskers
Member
For those who aren't reading the whole thread, I posted a low cost, nice looking fix for this.
Easy and effective low frequency fix
I have solved the low frequency issue with my car. I had a 41 Hz standing wave that would come and go. It wasn't good. If the hatch bumpers are loose, a crazy subsonic buffeting occurs. I'm talking about the annoying rumble that is still there when the bumpers are properly adjusted. To keep it...
Just want to say thanks for all the info you're sharing and testing. Great stuff! I just got my car last week and kind of maybe felt something while driving it around. When I did the paper test I found the top right one was gripping well, but the other 3 weren't even hitting. Messed around with them and it seems to feel a lot better. Could be a placebo effect as well who knows.. but so far seems to be better. I was going to try your low cost fix in the future and see what that does too.
MrWhiskers
Member
Just want to say thanks for all the info you're sharing and testing. Great stuff! I just got my car last week and kind of maybe felt something while driving it around. When I did the paper test I found the top right one was gripping well, but the other 3 weren't even hitting. Messed around with them and it seems to feel a lot better. Could be a placebo effect as well who knows.. but so far seems to be better. I was going to try your low cost fix in the future and see what that does too.
I stand corrected. The low speeds were once again bothering me. I'm trying to adjust the stoppers incrementally it's just hard to know exactly which one may be off. One thing I did notice this time is that my top right bumper can't be turned clockwise/inwards any further and it has a TIGHT seal when closed. If I do the envelope test I basically end up ripping the envelope before it gives. Is this potentially a sign of a misaligned hatch?
ilovecoffee
Member
Those upper stoppers with the nuts are tricky to turn/adjust. Don't be afraid to turn it completely out of the hatch. It's very easy to put back. Once you take it out you can better adjust the nut on the stopper and see how it works.I stand corrected. The low speeds were once again bothering me. I'm trying to adjust the stoppers incrementally it's just hard to know exactly which one may be off. One thing I did notice this time is that my top right bumper can't be turned clockwise/inwards any further and it has a TIGHT seal when closed. If I do the envelope test I basically end up ripping the envelope before it gives. Is this potentially a sign of a misaligned hatch?
John in LB
Member
Absolutely do this - I did on the X... I used a tiny dab of mayonnaise for the mark without any tape. Works great - afterwards, just wipe off...Suspect that the hatch stops are not correctly adjusted...
Check your hatch... There is a lot of fuss about gaps on this and that but have you checked to see that your hatch rubber bumpers are all properly adjusted? If not the hatch can be a big source of noise and air pressure fluctuation in the cabin. A quick check... close a door briskly and observe the hatch to see any movement, or gently push down on a corner... there should be no movement if the bumpers are properly adjusted.
After the hatch hinges are set properly, back off all four of the adjustment feet and make sure that the latch engagement is smooth.
Once the hatch position and latch are set, use something to provide a transfer mark at each rubber contact point... I used blue tape and a smudge of anti-seize to witness transfer.
Close the hatch, then open it and see if the bumper actually mates up. If it does make contact, a witness mark will appear. Extend them all slightly and repeat.
Once you get contact at a bumper stop extending that one. Continue to extend the bumpers not making contact until all four are in contact. Add a quarter turn to each to finish.
The SC or mobile tech will do a quick bumper adjustment to get the hatch to resist movement or make up for a slightly misaligned hinge... there are four contact points and any two making contact will be better than one, or none but it takes a bit more time to meticulously set the hinges and set all of the bumpers. If you care...
I love this car
")
Similar threads
- Replies
- 47
- Views
- 2K
- Replies
- 11
- Views
- 336
- Replies
- 0
- Views
- 241