Welcome to Tesla Motors Club
Discuss Tesla's Model S, Model 3, Model X, Model Y, Cybertruck, Roadster and More.
Register

Vendor Tesla Model 3 | DIY Ceramic Coating

This site may earn commission on affiliate links.
Under no circumstances on a new car should you be using anything other than the finest grade polishing compound.
I disagree, we are talking about a new car paint job that is no longer new due to tesla service center wiping his car with a microfiber they probably dropped on the ground and scratching up his paint.

I have all kinds of paint defects still that a fine polish isn't going to remove, paint nibs etc. Would need a stage 3 correction to get it right. Actually some things would require repaint and even though I already had 4 or so panels repainted from the factory there are still more paint defects and fisheyes, and nibs that are under the clearcoat.

That statement is overly broad, while it SHOULD be true there are always exceptions.
 
Last edited:
I disagree, we are talking about a new car paint job that is no longer new due to tesla service center wiping his car with a microfiber they probably dropped on the ground and scratching up his paint.

I have all kinds of paint defects still that a fine polish isn't going to remove, paint nibs etc. Would need a stage 3 correction to get it right. Actually some things would require repaint and even though I already had 4 or so panels repainted from the factory there are still more paint defects and fisheyes, and nibs that are under the clearcoat.

That statement is overly broad, while it SHOULD be true there are always exceptions.

And your post applies to 1-2% of people who need to get professional consultation before they do something as radical as putting a high-grade rubbing compound on their new car. So I'll stick by my statement – 98% of the time It's a serious mistake to use anything other than polishing compound. For those folks whose paint is so mucked up that they need rubbing compound, those folks are in trouble anyway, and they probably will need to have their cars repainted and professionally serviced.

Bottom line – when you make people who have virtual OCD about their vehicles paranoid that they should apply a radical treatment during surface prep for ceramic coating that's potentially going to cause more harm than good, you are contributing to disinformation and user mistakes. The vast majority of folks who are doing ceramic coating should not apply rubbing compound. I'll stick by that statement
 
Last edited:
And your post applies to 1-2% of people who need to get professional consultation before they do something as radical as putting a high-grade rubbing compound on their new car. So I'll stick by my statement – 98% of the time It's a serious mistake to use anything other than polishing compound. For those folks whose paint is so mucked up that they need rubbing compound, those folks are in trouble anyway. Bottom line – when you make people who have virtual OCD about their vehicles paranoid that they should apply a radical treatment that's going to cause more harm than good, you are contributing to disinformation and user mistakes.
Dude theres more than one grade of polishing compound, even under the mirror glaze brand.
Mirror Glaze - Professional - Product Lines

I used M9 (or maybe it was M82) on my car before PPF because it is less abrasive than M205 and I didn't have swirls, while other polishes like Meguires Ultimate Polish add things you don't want to your paint before Ceramic.

Something like M83 or M2 will help cut in a bit faster for those swirls he was having trouble removing with M205.

So really something like M82 would be ideal for new cars, but M205 is a better place to start if you have deeper swirls. But that does not mean you should not use M83 if your still finding swirls in problem areas after a considerable amount of time. Even M205 can vary some by changing to a more abrasive pad.

I'm in no way an expert, but that's how polishes work.
 
Last edited:
Dude theres more than one grade of polishing compound, even under the mirror glaze brand.
Mirror Glaze - Professional - Product Lines

I used M9 (or maybe it was M82) on my car before PPF because it is less abrasive than M205 and I didn't have swirls, while other polishes like Meguires Ultimate Polish add things you don't want to your paint before Ceramic.

Something like M83 or M2 will help cut in a bit faster for those swirls he was having trouble removing with M205.

So really something like M82 would be ideal for new cars, but M205 is a better place to start if you have deeper swirls. But that does not mean you should not use M83 if your still finding swirls in problem areas after a considerable amount of time. Even M205 can vary some by changing to a more abrasive pad.

I'm in no way an expert, but that's how polishes work.

We finally agree!:p:p
 
  • Like
Reactions: Glamisduner
Dude theres more than one grade of polishing compound, even under the mirror glaze brand.
Mirror Glaze - Professional - Product Lines

I used M9 (or maybe it was M82) on my car before PPF because it is less abrasive than M205 and I didn't have swirls, while other polishes like Meguires Ultimate Polish add things you don't want to your paint before Ceramic.

Something like M83 or M2 will help cut in a bit faster for those swirls he was having trouble removing with M205.

So really something like M82 would be ideal for new cars, but M205 is a better place to start if you have deeper swirls. But that does not mean you should not use M83 if your still finding swirls in problem areas after a considerable amount of time. Even M205 can vary some by changing to a more abrasive pad.

I'm in no way an expert, but that's how polishes work.

I used M205 on mine and my paint was in fairly good condition starting out. I did have some fine scratches in a few place and due to my newbness I didn't use enough pressure when doing the hood and later with very high powered lighting I could see a few scratches I didn't get out.

Overall though I got extremely good results with M205 and there's no way I burned the clear coat using it.

Not using any pressure is almost as big of a problem as using too much pressure. A lot of videos imply you should only be using the weight of the polisher but that's really not going to cut it. You need to put about 5-10lbs of force on the head to cut into those swirls unless you're using a more aggressive cutting compound which I definitely would not recommend if it's your first time.

I had a pretty good scratch going across a fender and a door that showed up pretty stark when I put a light on it. It kind of looked like someone with a bag or purse just dragged it along the side of the car. :rolleyes:. At first I could not get it out. I used just a little more polish compound than I thought I needed and a little more pressure and they came out completely.

30 minutes a panel sounds about right to me. It takes time if you want good results.

Overall it's not a hard job, it's just a very time consuming job if you want to do it right. I spent 10 hours on mine and had to throw the towel in after only doing 1 coat of Kamikaze on my entire car and 2 coats on a few key areas like hood and fenders. Temps were plummeting below the recommended application level and I didn't want to turn my 10+ hour day into a further marathon.

I learned a lot doing it, I think next go around I will be able to spend a bit more time and do an even better job. I would also entertain the idea of paying a mobile detailer to polish off whatever remains of the old ceramic and then all I would have to focus on was minimal prep and ceramic application which is a much lower stress job than paint correction.

The only other advice I can give is you want to do this as soon after taking delivery of your car as possible. At delivery go over the car with a fairly bright light and if it's already really beat up see if you can get Tesla to pay for paint correction... It will be a hell of a lot easier to do the polishing and ceramic coating if the car starts out in fairly good shape than if you drive it for six months, let it get beat up and THEN decide it's time to ceramic coat it. In such cases you would spend at least 2X as much time on the paint correction as I did.
 
  • Like
Reactions: Glamisduner
I used M205 on mine and my paint was in fairly good condition starting out. I did have some fine scratches in a few place and due to my newbness I didn't use enough pressure when doing the hood and later with very high powered lighting I could see a few scratches I didn't get out.

Overall though I got extremely good results with M205 and there's no way I burned the clear coat using it.

Not using any pressure is almost as big of a problem as using too much pressure. A lot of videos imply you should only be using the weight of the polisher but that's really not going to cut it. You need to put about 5-10lbs of force on the head to cut into those swirls unless you're using a more aggressive cutting compound which I definitely would not recommend if it's your first time.

I had a pretty good scratch going across a fender and a door that showed up pretty stark when I put a light on it. It kind of looked like someone with a bag or purse just dragged it along the side of the car. :rolleyes:. At first I could not get it out. I used just a little more polish compound than I thought I needed and a little more pressure and they came out completely.

30 minutes a panel sounds about right to me. It takes time if you want good results.

Overall it's not a hard job, it's just a very time consuming job if you want to do it right. I spent 10 hours on mine and had to throw the towel in after only doing 1 coat of Kamikaze on my entire car and 2 coats on a few key areas like hood and fenders. Temps were plummeting below the recommended application level and I didn't want to turn my 10+ hour day into a further marathon.

I learned a lot doing it, I think next go around I will be able to spend a bit more time and do an even better job. I would also entertain the idea of paying a mobile detailer to polish off whatever remains of the old ceramic and then all I would have to focus on was minimal prep and ceramic application which is a much lower stress job than paint correction.

The only other advice I can give is you want to do this as soon after taking delivery of your car as possible. At delivery go over the car with a fairly bright light and if it's already really beat up see if you can get Tesla to pay for paint correction... It will be a hell of a lot easier to do the polishing and ceramic coating if the car starts out in fairly good shape than if you drive it for six months, let it get beat up and THEN decide it's time to ceramic coat it. In such cases you would spend at least 2X as much time on the paint correction as I did.
The more time you spend prettying the better results your going to get. Within reason of course ;)
 
Haha yeah. Black color is tough.

Did you apply reload too? Also, do you recommend any window cleaner? Some of the polish got onto the windows and it smeared.
My ceramic coating was different. I used Gyeon Mohs Syncro which came with “Skin” which makes it super slick.

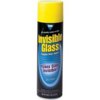
For glass I prefer Invisible Glass.
 

Attachments

  • A64A2979-B3D7-4A36-8A5C-46D3389CD4F1.jpeg
    A64A2979-B3D7-4A36-8A5C-46D3389CD4F1.jpeg
    12.1 KB · Views: 183
I got Gyeon Mohs Syncro kit to apply it for my model 3. I am planning to apply it sometime this week. My garage is not heated and the temperature in wisconsin will be around 35F. I guess it will be around 45F in the garage. Is it safe to apply Gyeon Mohs when it is this cold or is it better to wait till the spring?
 
I got Gyeon Mohs Syncro kit to apply it for my model 3. I am planning to apply it sometime this week. My garage is not heated and the temperature in wisconsin will be around 35F. I guess it will be around 45F in the garage. Is it safe to apply Gyeon Mohs when it is this cold or is it better to wait till the spring?
I suspect their website clarifies a minimum ambient temperature. I don't know for sure what that might be but most literature on this suggests that 50 to 55 degrees is an ambient temperature minimum.
 
Thanks dfwatt.

I got coupe of portable electric heaters to increase the temperature in the garage. I will keep you all posted with the results.

Thanks.

It’s not just the temp when applying but also while curing. Will need to be washed and surface should be properly prepped before applying as well...decon spray, clay bar, polished , prep spray. Will all that be done in the garage as well with portable heaters?
 
So I've just finished this process on my M3. Quick breakdown/thoughts

First (about 2 hours total work)
  • I started with a regular car wash with a hose/sponge
  • Brought the car into garage, did a waterless car wash
  • Clayed the entire car
Second (I spent about 4-6 hours on this)
  • Polished the car with my porter cable random orbital
  • I have a chemical guys kit, used the white pad with the V36 polish first, then moved to the red pad (softest) with V38
  • I still had lots and lots of microscratches after many hours of polishing. I was afraid to use a harsher pad/polish, so I just told myself it'd be fine
Third/last (about 3 hours total)
  • Applied the ceramic on the entire car. Temps in my garage were about 50-55 degrees F. For the first coat, i let it sit for maybe 10 seconds then I would wipe off
  • Let it sit overnight, car didn't really look any better in the morning, applied a second coat of ceramic (even after two, I still have some left in the bottle) and this time waited about 30 seconds before wiping
  • Let sit 24 hours and now it looked much better/shinier
  • Applied final Cure coat stuff, which took almost no time at all
Got the car outside and wow, it looks great. Yes, under LED and up-close looking, you will totally still see microscratches. But outside and 2-3 feet away, you can't see them at all and the car looks great.
 
  • Funny
  • Like
Reactions: 1051 and Beaver
Just got done with coating my 3 with Feynlab Ceramic Lite. The polishing process was time and energy consuming, but also so damn rewarding. After testing with Megs Ult Polish I decided to just do one-step paint correction and skip compound.

Some before and agrees as well as final result. I still have about 1/2 of the 40mL bottle of coating left, not sure if I didn’t put enough on the car. I coated the windshield, glass roof, and rear window also.
 

Attachments

  • 6CED0375-9EBA-428A-AB62-CA04DB485BEF.jpeg
    6CED0375-9EBA-428A-AB62-CA04DB485BEF.jpeg
    595.5 KB · Views: 165
  • 0C0163F8-4A19-4CF1-B615-C5F2F59680BA.jpeg
    0C0163F8-4A19-4CF1-B615-C5F2F59680BA.jpeg
    668.2 KB · Views: 146
  • EB603715-E3CE-45A9-AC90-3C2ACD16676B.jpeg
    EB603715-E3CE-45A9-AC90-3C2ACD16676B.jpeg
    981.9 KB · Views: 148
  • 25FD9A25-5089-4D6B-9DE8-DE208382CE5A.jpeg
    25FD9A25-5089-4D6B-9DE8-DE208382CE5A.jpeg
    370.3 KB · Views: 155
  • 4169C4B8-60D8-4361-93AA-857BBDBEC7E0.jpeg
    4169C4B8-60D8-4361-93AA-857BBDBEC7E0.jpeg
    532 KB · Views: 147
  • 2A1BE274-7AA9-4674-A988-A4FD1931C8B3.jpeg
    2A1BE274-7AA9-4674-A988-A4FD1931C8B3.jpeg
    375.1 KB · Views: 153
  • 337A5F75-E7FA-42B4-94CC-531D70F7B553.jpeg
    337A5F75-E7FA-42B4-94CC-531D70F7B553.jpeg
    402.3 KB · Views: 158
  • 058377E7-2FA5-4DCA-94A4-60051E1A5CFB.jpeg
    058377E7-2FA5-4DCA-94A4-60051E1A5CFB.jpeg
    313.4 KB · Views: 150
  • 97BD71C5-F97C-4339-B382-2401B52D0681.jpeg
    97BD71C5-F97C-4339-B382-2401B52D0681.jpeg
    400.5 KB · Views: 151
So I've just finished this process on my M3. Quick breakdown/thoughts

First (about 2 hours total work)
  • I started with a regular car wash with a hose/sponge
  • Brought the car into garage, did a waterless car wash
  • Clayed the entire car
Second (I spent about 4-6 hours on this)
  • Polished the car with my porter cable random orbital
  • I have a chemical guys kit, used the white pad with the V36 polish first, then moved to the red pad (softest) with V38
  • I still had lots and lots of microscratches after many hours of polishing. I was afraid to use a harsher pad/polish, so I just told myself it'd be fine
Third/last (about 3 hours total)
  • Applied the ceramic on the entire car. Temps in my garage were about 50-55 degrees F. For the first coat, i let it sit for maybe 10 seconds then I would wipe off
  • Let it sit overnight, car didn't really look any better in the morning, applied a second coat of ceramic (even after two, I still have some left in the bottle) and this time waited about 30 seconds before wiping
  • Let sit 24 hours and now it looked much better/shinier
  • Applied final Cure coat stuff, which took almost no time at all
Got the car outside and wow, it looks great. Yes, under LED and up-close looking, you will totally still see microscratches. But outside and 2-3 feet away, you can't see them at all and the car looks great.

When you did the polishing did you go over the whole car with v36 first and then do another pass with v38? or did you do it section by section switching pads?
 
Lots of good info here. I'd like some opinions on my plans.

I have a white model 3 which is almost new. I've examined the finish closely with an LED light and I don't see any scratches or swirls at all. Guess I won the paint lottery. But I plan to ceramic coat and don't want to skimp on polishing as the pics in this thread are amazing.

So I'm thinking that I would use Meguiar's M82 which as I understand it, is one step lighter than M205. https://www.amazon.com/gp/product/B0002SQYG4/ref=ox_sc_act_title_1?smid=ATVPDKIKX0DER&psc=1

I was considering doing it by hand given the decent shape of the paint but after reading here I may get a DA polisher to do it.

Thanks in advance for any advice.

Wow! No paint defects that is similar to winning the paint lottery. I think a light polishing won’t hurt. Take your time and enjoy. Don’t forget to share the love with some pics.